

 21 hours ago
8
21 hours ago
8
PROTECT YOURSELF with Orgo-Life® QUANTUM TECHNOLOGY
Orgo-Life the new way to the future Advertising by Adpathway
In our latest Make Your Own Bikepacking Gear (MYOBG) tutorial, Mireille Kidd shares a step-by-step guide to sewing a handy tool roll for organizing all your bits and bobs, complete with multiple pockets and a simple closure. Find Mireille’s how-to and explore our wide-ranging archive of other DIY projects here…
Last summer, I decided last minute to join my friends on a northern portion of the Great Divide. I was about to do the longest bike trip I’d ever done and had just one month to prepare. Every trip highlights what can change or improve, and this trip meant a better toolkit. I wanted to be as self-sufficient as possible. I read for hours about people’s favorite bikepacking tools, and somewhere in the mix, I began looking at tool rolls too.
For better or worse, my first inkling before buying certain items is always, “Can I make it, and how?” I was on a tight timeline and didn’t have time to prototype. Luckily, the design is simple and came together quickly. While out riding, Maggie, who instigated the Divide trip, liked my tool roll more than hers, and before the next riding season, I made her a cheetah-print roll using Ottertex. I applied my realization that the mesh pocket needed pleats, and after seeing Maggie’s version in use, I increased the height and width so it folds and rolls more evenly when stuffed.

Sometimes, simple solutions can save a lot of headache. Knowing I had a stocked, organized kit gave me peace of mind and made it easy to use while out on the trail.
What You’ll Need
- XPAC // Cordura // Wax Canvas // Ottertex (Pieces A: COMMON LOOP, B: EXTERIOR, D: POCKET)
- Liner material. I used 400D pack cloth (Pieces C: FLAP, F: INTERIOR)
- Heavy Duty Vinyl Coated Mesh (Piece E: MESH)
- 3/4” Grosgrain or DIY bias tape (1 yard)
- #5 Zipper and zip pull (6.5 inches)
- 3/4” Hook (5 inches)
- 3/4” Loop (5.5 inches)
- 3/4” Common Loop (quantity 1)
Use creative freedom when choosing materials! This project is small enough to use scraps or old gear. Cordura backpacks, banners, or retired technical jackets could work. I recommend a heavier exterior material—something that can withstand abrasion and grubby hands but is still flexible enough to roll.
For the interior, use nylon or polyester, something flexible and light. 200-400D Packcloth works wonderfully; however, I know it’s niche to have on hand. I used French Oil cloth on my first version as the liner and the binding material, and it is still holding up. While not as durable as packcloth, it has a coating that helps it be water-resistant and gives the same smooth appearance/feel as tightly woven packcloth. A bright liner color helps you spot your tools inside.
Mesh allows you to see the contents of your zip pouch. Because the mesh pocket is pleated to expand, the material needs to be pliable enough to fold but structurally stiff enough to hold shape. Do not use apparel or lightweight utility mesh; it is too flexible and will sag or rip. A vinyl-coated polyester is best. If mesh is not an option, use the same material as the liner.
You can use coil zip or molded plastic. Just remember not to sew over the teeth of a plastic zipper, as it will break needles. The common loop is a small, rectangular plastic loop that will create a stationary anchor point for our hook and loop to pass through and fold back on itself. Polyester thread is superior for strength and colorfastness. I made my first version with a basic home thread weight, commonly called Sew All. I now prefer Gutermann Mara 70. Its strength is better suited for outdoor materials, and it creates a thicker stitch line. Please make sure your needle size matches your machine and the thread weight you choose!
Cutting Dimensions
- A: COMMON LOOP (x1) – 1.25” x 2.75”
- B: EXTERIOR / F: INTERIOR (x1 each) – 5.25” x 11.5”
- C: FLAP (x2) – 3.25” x 7.25” (round 2 edges on one long edge, use a coin to trace)
- D: POCKET (x1) -4.25” x 7.25”
- E: MESH (x1) – 6” x 5.25” x 4.25”
- #5 Zipper – 6.5” (x1)
- 3/4” Hook – 5” (x1)
- 3/4” Loop – 5.5” (x1)
Note piece B: EXTERIOR will require marking guide lines.
Draw a center line: Find the center of one short edge (~ 2 5/8” ). Draw a line 8” out from the edge, down the length of the panel.
Mark the Common Loop: Centered across that line, mark two 3/4” lines parallel to the short edge at .75” and 1.75”.
Mark the Hook & Loop: Centered across that same line, mark two 3/4” lines parallel to the short edge at 3.75” and 8”.
Step One
If printing the pattern (download a PDF here), tape it together and cut out the shaded rectangles on piece B/F. Use the rectangle cutouts to make guide marks on the right side of B: EXTERIOR.
Cut your fabric and mark necessary guide lines with temporary pencil.
Step Two
Many of the tool rolls have a flap over the pocket, and I kept this feature. If using packcloth, note the subtle difference between the front and back: the shiny coated side is the back, while the front is matte and textured.

Stitch together the two cut pieces for C: FLAP. Stitch face to face with a 1/4” seam allowance, leaving the long edge with square corners open. When stitching, try to round the corners as best as you can; I slow down and use my handwheel. Backstitch both ends for a secure hold when turning the flap right-side out.
Notch the curved seam allowance, being careful not to cut stitches. Turn right-side out and use a pen or pencil to push out/shape the corners. Topstitch 1/8” from the edge. Once again, no need to stitch the long edge with square corners.
Put this piece to the side for now.
Step Three
There are variations when assembling the closure: 1. Replace A: COMMON LOOP with webbing (just be sure your widths match). 2. Utilize a Voile strap you may already have on hand to wrap around a finished roll. In this case, disregard all of Step Three!
I wanted a simple closure method that didn’t add bulk and wouldn’t break. Aesthetically, I chose to cut and sew the A: COMMON LOOP piece so I can match or contrast the main body material. To construct the common loop attachment, fold the long edges of A: COMMON LOOP 1/4” inward. Topstitch 1/8” from both folded edges, backstitch at both ends to create a 3/4” wide strap.
Thread this strap through your common loop hardware, creating a 1” overlap. Fold the remaining tail over the 1” portion. Align this assembly with your guide marks on the right side of B: EXTERIOR (The common loop hardware will be closest to the short edge). Anchor with two parallel bartacks spaced about 1/2” apart. Try a 2.5 width and 1 length setting on a domestic machine.
Next, join the hook (5”) and loop (5.5”) by overlapping them 3/4” facing the same direction. Secure with a bartack or box stitch. If you bartack, try to match the distance between them to be similar to the spacing on the common loop attachment, ~1/2” between tacks.
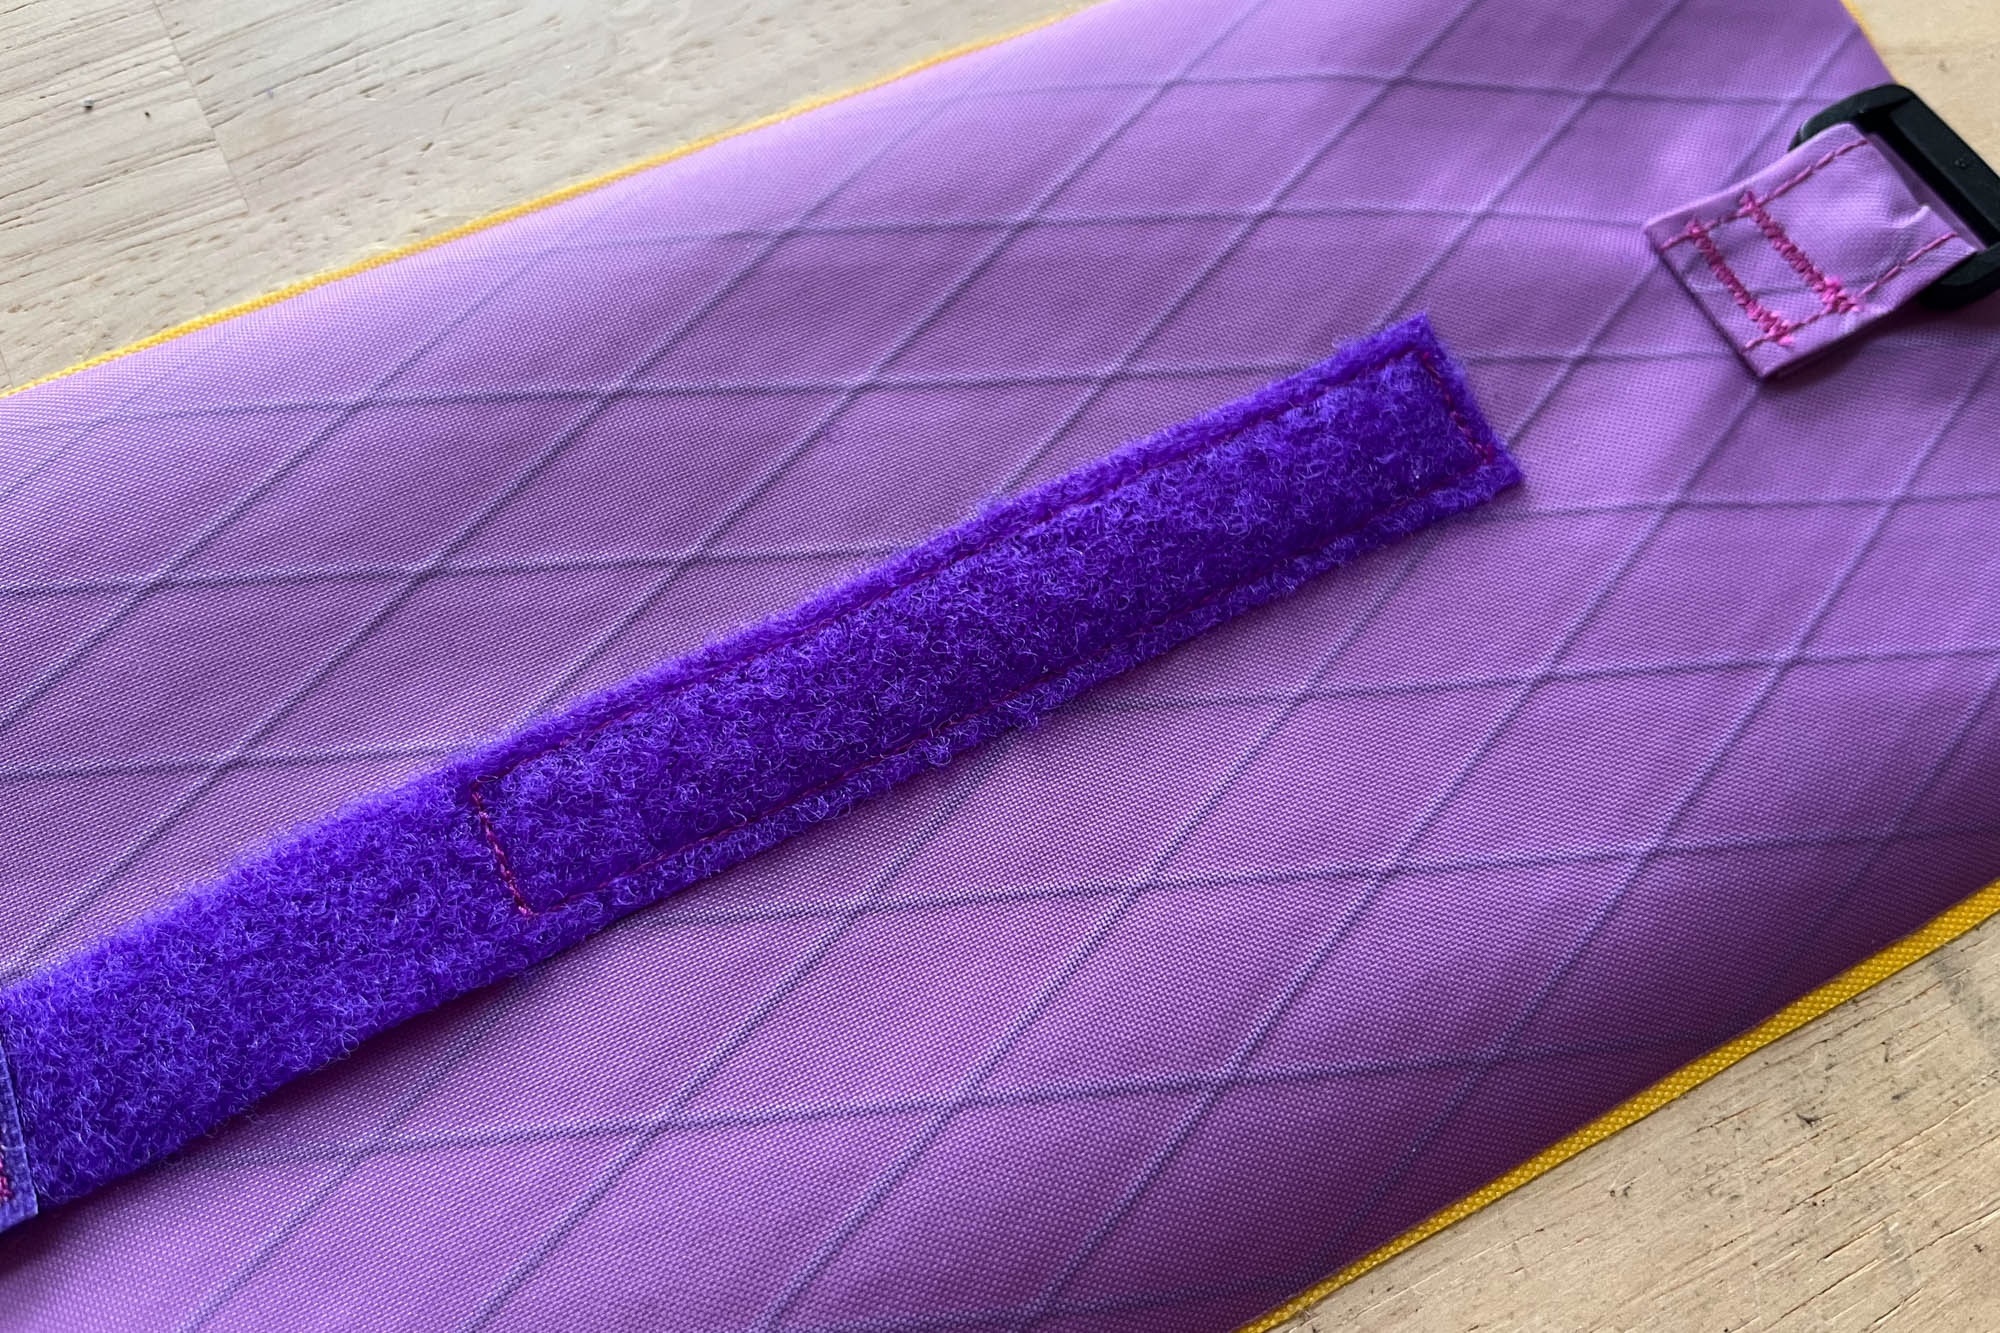
Once the hook and loop are joined, the loop can be stitched face up on the right side of B: EXTERIOR with a 1/8” seam allowance. I start on the short edge of the loop closest to the common loop. I then follow the long edge, making sure I am lined up with the guide marks and ready to turn the corner at the second short edge (not all of the loop length is sewn down, so watch for the corner. You could even extend your 8” guide marks beyond 3/4” to be sure you don’t miss the turn). On the second short edge, backstitch 3x, creating a Z-shaped overlap: forward, backward, and forward again. Continue along the second long edge and make a second line of stitches over your first stitches on the short edge.
Step Four
Begin assembling the interior piece by creating slide pockets—open, flat compartments stitched onto the lining. The slide pockets make up the right-hand 2/3 of the roll. In my first iteration, I used oil cloth to bind the edge by cutting a 1 1/4” strip the same length as the pocket, folded 1/4” in on the edges, and folded in half to sew on similar to 3/4” grosgrain.
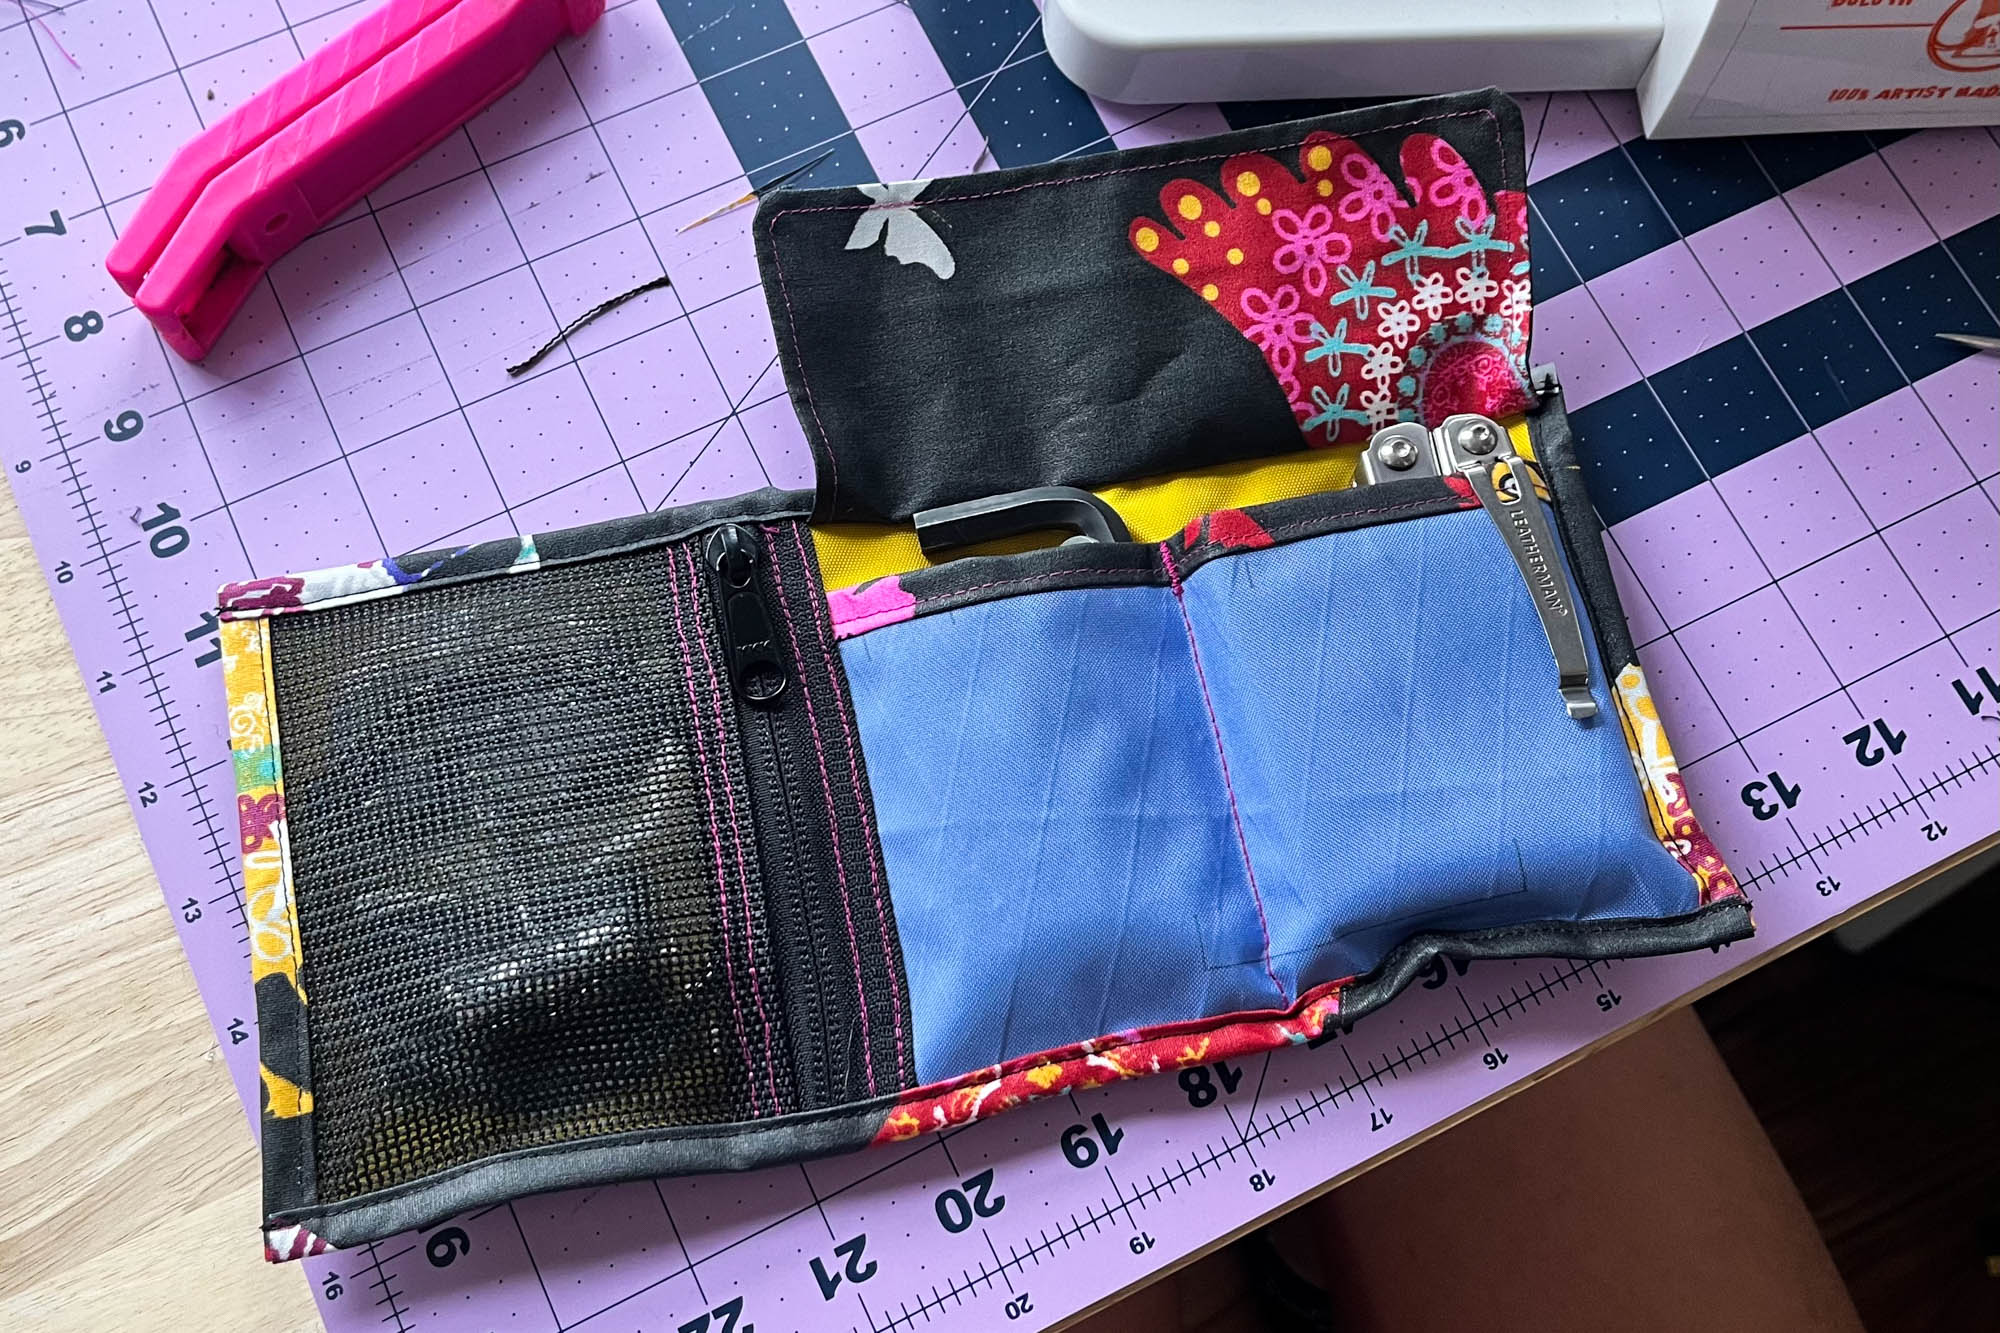
Bind one long edge of D: POCKET with 3/4” grosgrain. Trim the ends flush, and burn them with a lighter to prevent fraying. The bound edge of D is the top of the pocket.
Position D: POCKET right side up on the right side of F: INTERIOR, aligning the lower right corner. Stitch the pocket to the lining with a 1/8” seam allowance. Start at the top of the right edge and work down and around to keep everything lined up. Stop and backstitch when you get to the other side of the grosgrain. Do not stitch the pockets shut.
Use a clear sewing ruler and temporary marking pencil to create guides for stitching the slide and mesh zip pockets. Measure and mark at 3 3/4” and 7” from the right edge. A 3 3/4” mark will create two pockets and help the roll fold in thirds. A 7” mark will help align the zipper pocket after assembly.
Sew along the 3 3/4” divider line, backstitching at the bottom edge and finishing with a bartack at the grosgrain binding to prevent the pocket divider from ripping under load. I use a smaller tack here, reducing the width to 1.
Step Five
I was drawn to rolls with zip pockets for things like brake pads, valve stems, cables, bacon, patches, needle and thread, etc. The zip pocket creates the final left-hand third of the interior. After making the first roll, I realized the mesh pocket needed pleats to give volume so it didn’t burst at the seams. You can also make the pocket from the liner or external material.
First, make two pleats along the long parallel edge of E: MESH. The mesh piece starts at 6” wide on one edge and needs to end up at 5.25” wide to match the width of the roll. Measure 1” in from the left edge, pinch a small fold, and fold it toward the outside left edge to create a 1/8” deep pleat. Repeat this on the other side: measure 1” in from the right edge, pinch, and fold toward the outside right edge. Clip, pin, or hold the pleats in place. Double-check that your piece now measures 5.25” wide. Baste across the pleats 1/8” from the raw edge to secure them. Use a long stitch length—about 1” to ensure stitches hold on the stiff mesh.
Swap to a zipper foot. Grab your #5 zipper, about 6.5” long. Using the interior piece as a reference, position the zip so it closes toward the top. Align the edge of the mesh opposite the pleats with the left side of the zipper; right sides together. Stitch 1/8” from the zipper coil. (Do not stitch to the interior piece yet).
Fold mesh or material of choice over the stitch line and double topstitch. Sew the first line of topstitching close to the inner folded edge of the fabric near the zipper teeth. Pivot and sew a second parallel line about 1/4” apart for strength and decoration. NOTE: When I have used basic home thread, I have stitched twice over my lines to create a visually thicker stitch line.
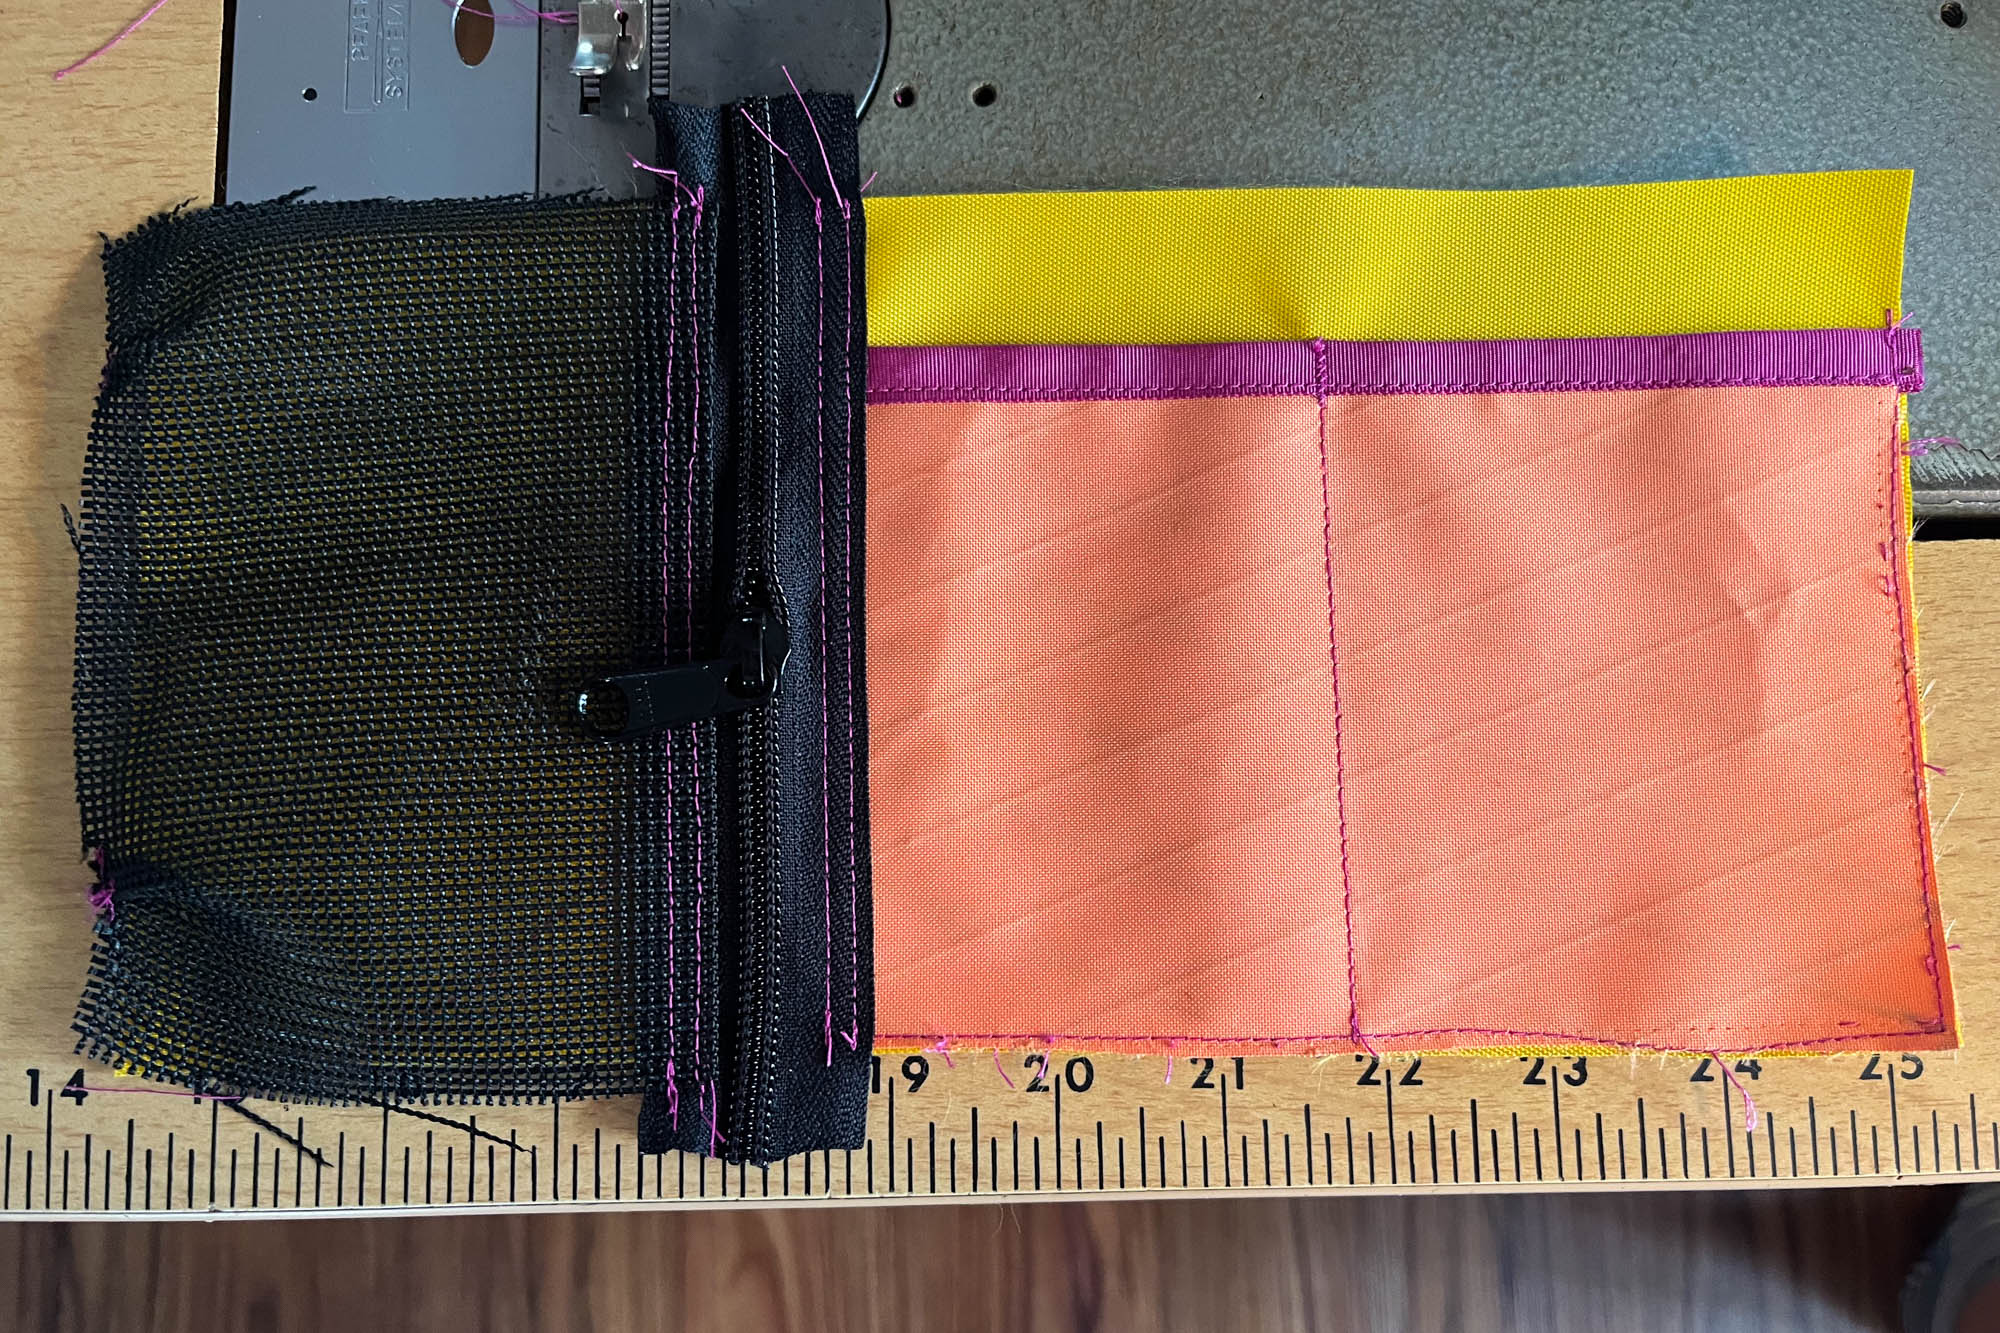
Align the right zipper edge with the 7” mark made earlier on F: INTERIOR. Overlap the zipper slightly so the first stitch line closest to the zipper edge is on the 7” mark. Center the mesh. Double topstitch to the liner with first stitch line starting closest to zipper edge.
Install zipper pull if it is not already a part of your zip coil.
To complete the zip pocket, edgestitch E: MESH to F: INTERIOR. I start at the zipper so any extra mesh can overhang, and I will trim it later. Stitch the three mesh sides to the interior with 1/8” seam allowance.
Clean up all edges—trim overhanging zipper, mesh, and grosgrain ends if not already done. Melt the zipper ends. The interior piece is now complete and ready to stitch to the exterior.
Step Six
Align B: EXTERIOR and F: INTERIOR wrong sides together, matching the exterior’s common loop side with the interior’s slide pockets. Stitch around the perimeter using a 1/8” seam allowance.
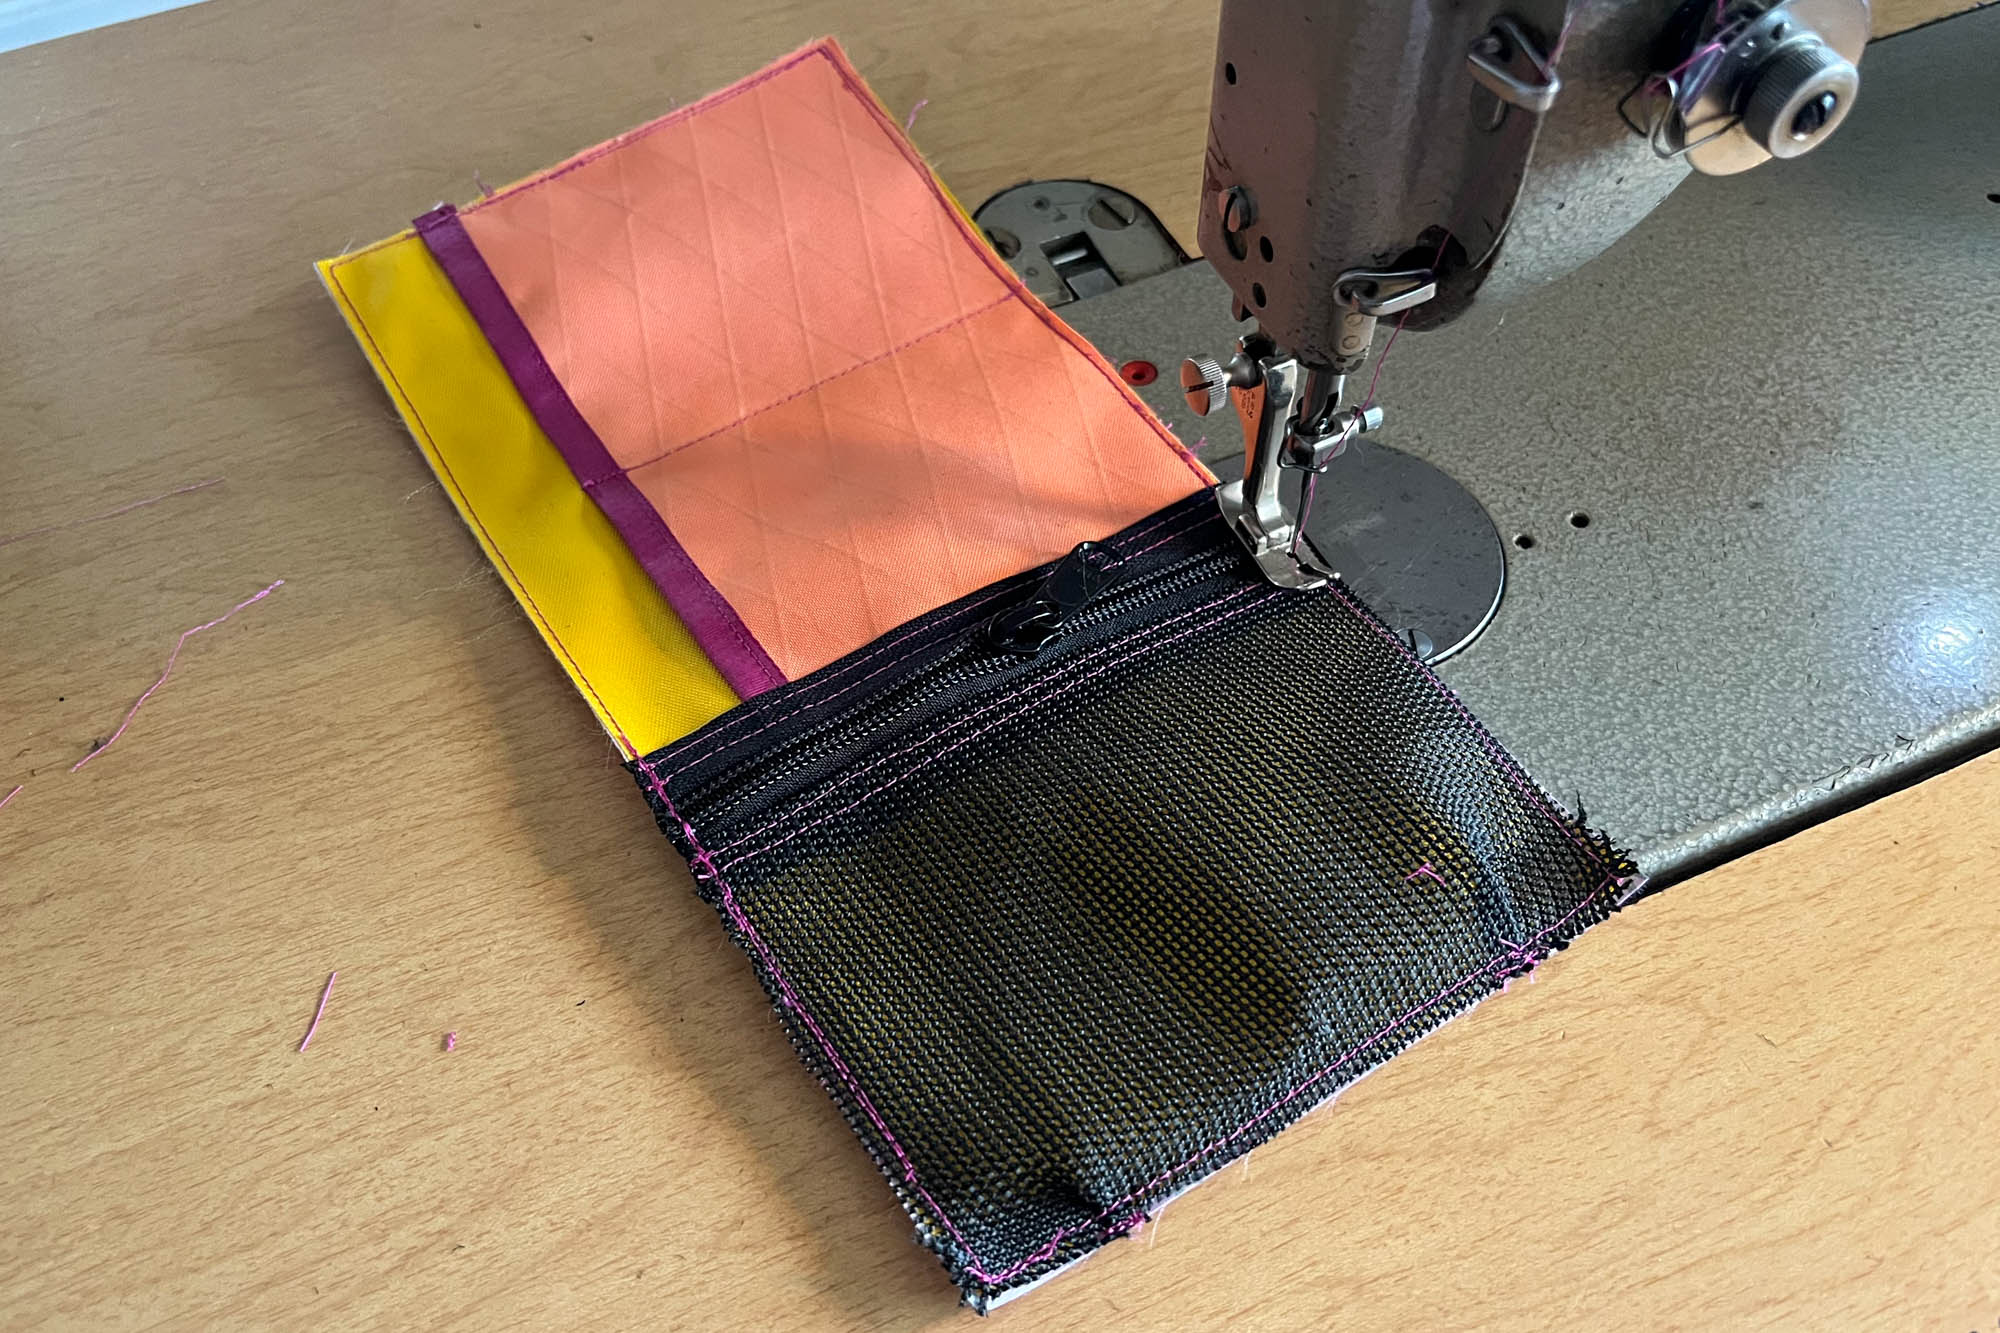
Tip: Flip the common loop hardware out of the path of your presser foot as you pass that edge.
Final Step!
The final steps of assembly. Binding the edges and finally attaching that flap.
Bind the short right edge of the slide pockets with grosgrain or DIY bias tape, backstitching at both ends. Trim binding completely flush with the raw top and bottom edges.
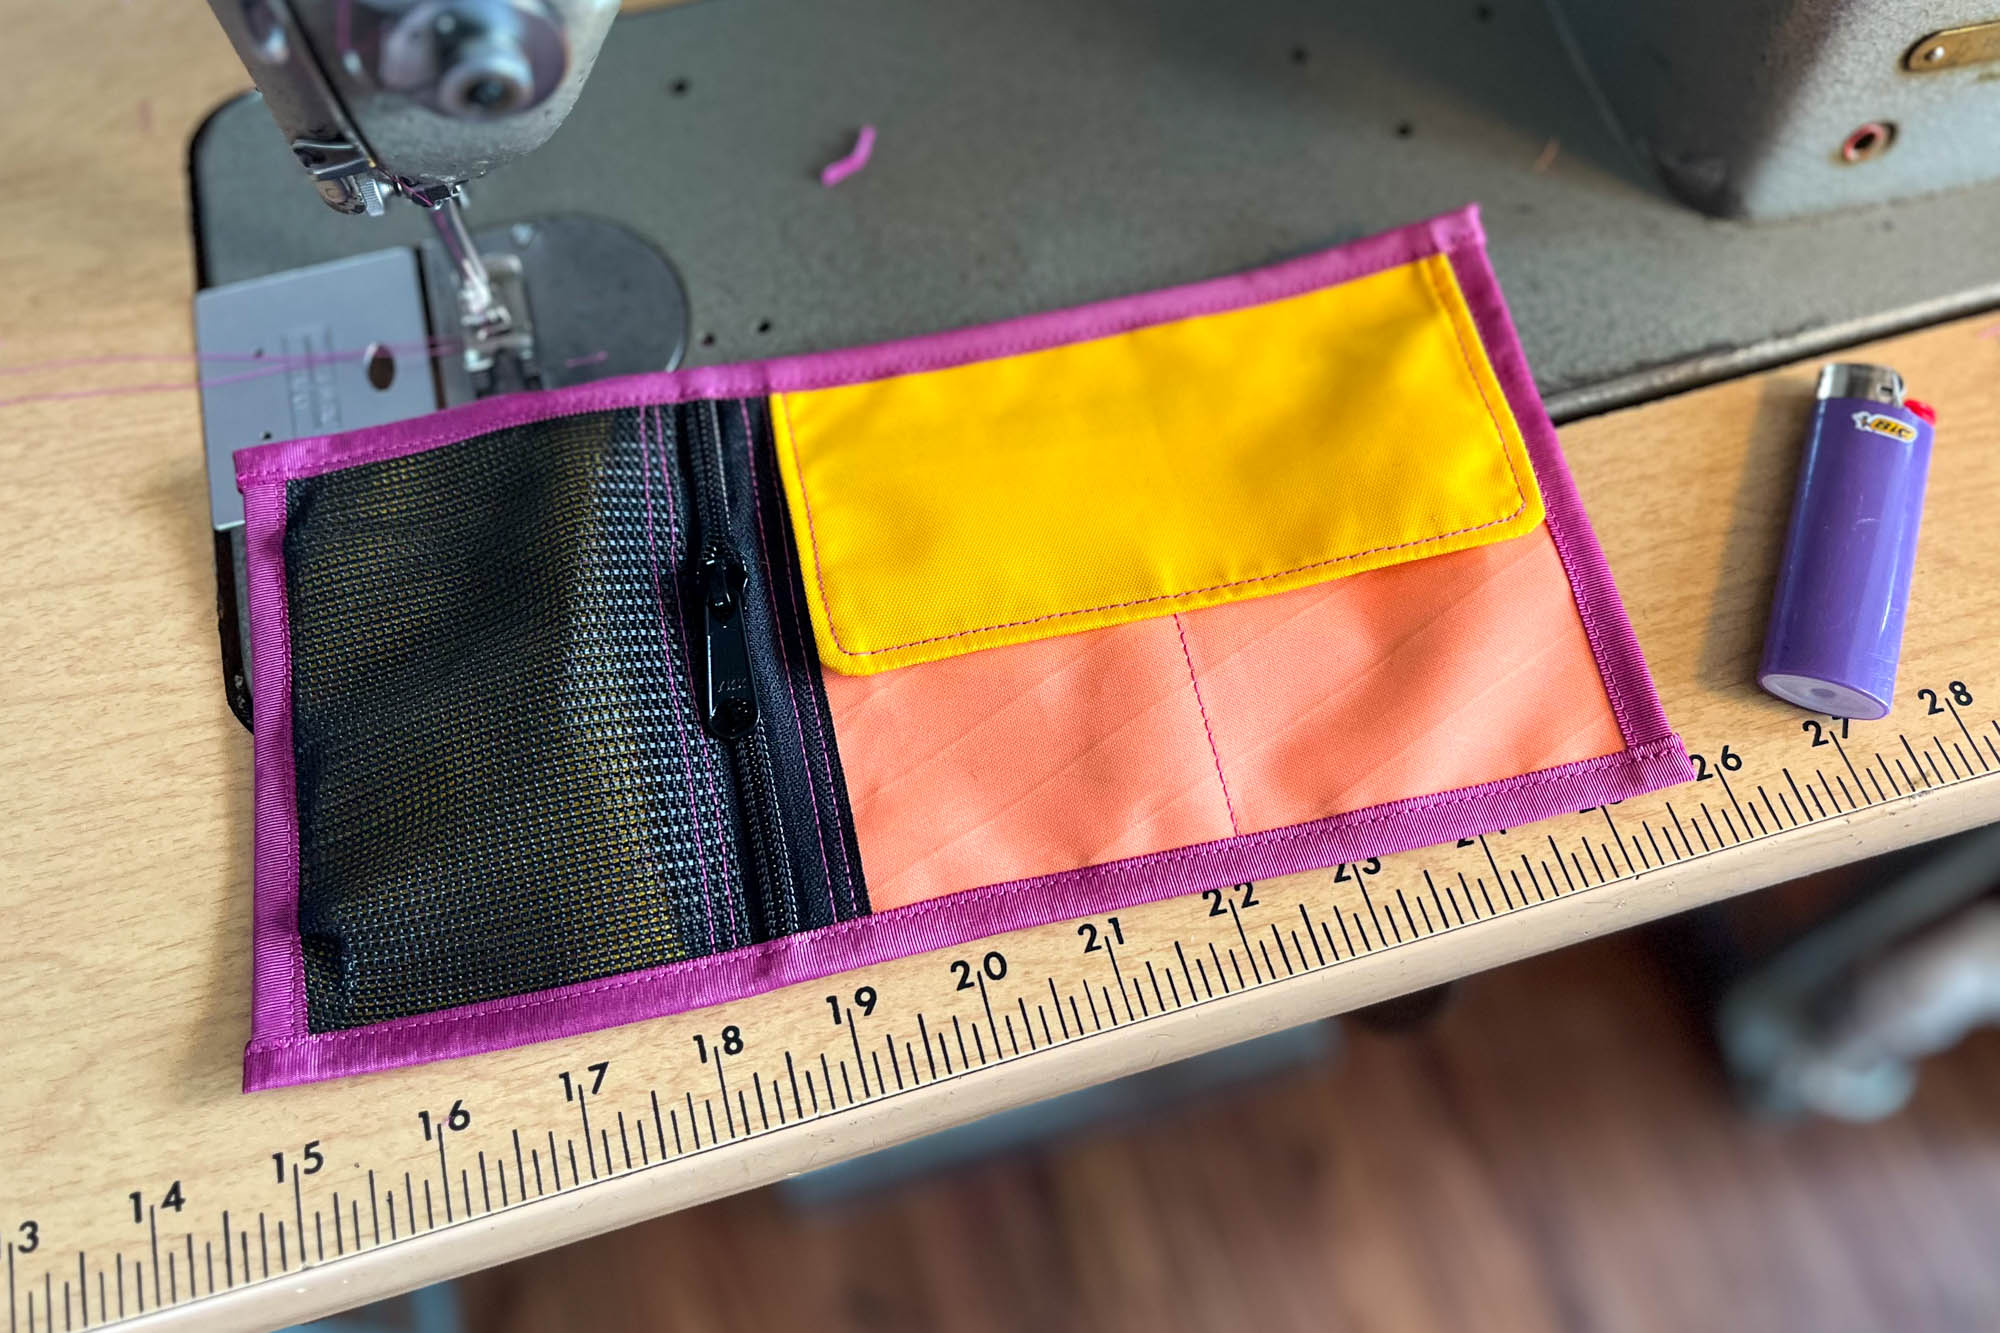
Before starting the other bound edges, we need to stitch the flap on. I do it in this order because it is difficult to bind the right edge after the flap is on. Sandwich the unstitched raw edge of your completed C: FLAP along the top edge of the roll. It should sit perfectly nested between the zipper on the left and the pocket binding on the right. Stitch the flap down with a 1/8” seam allowance.
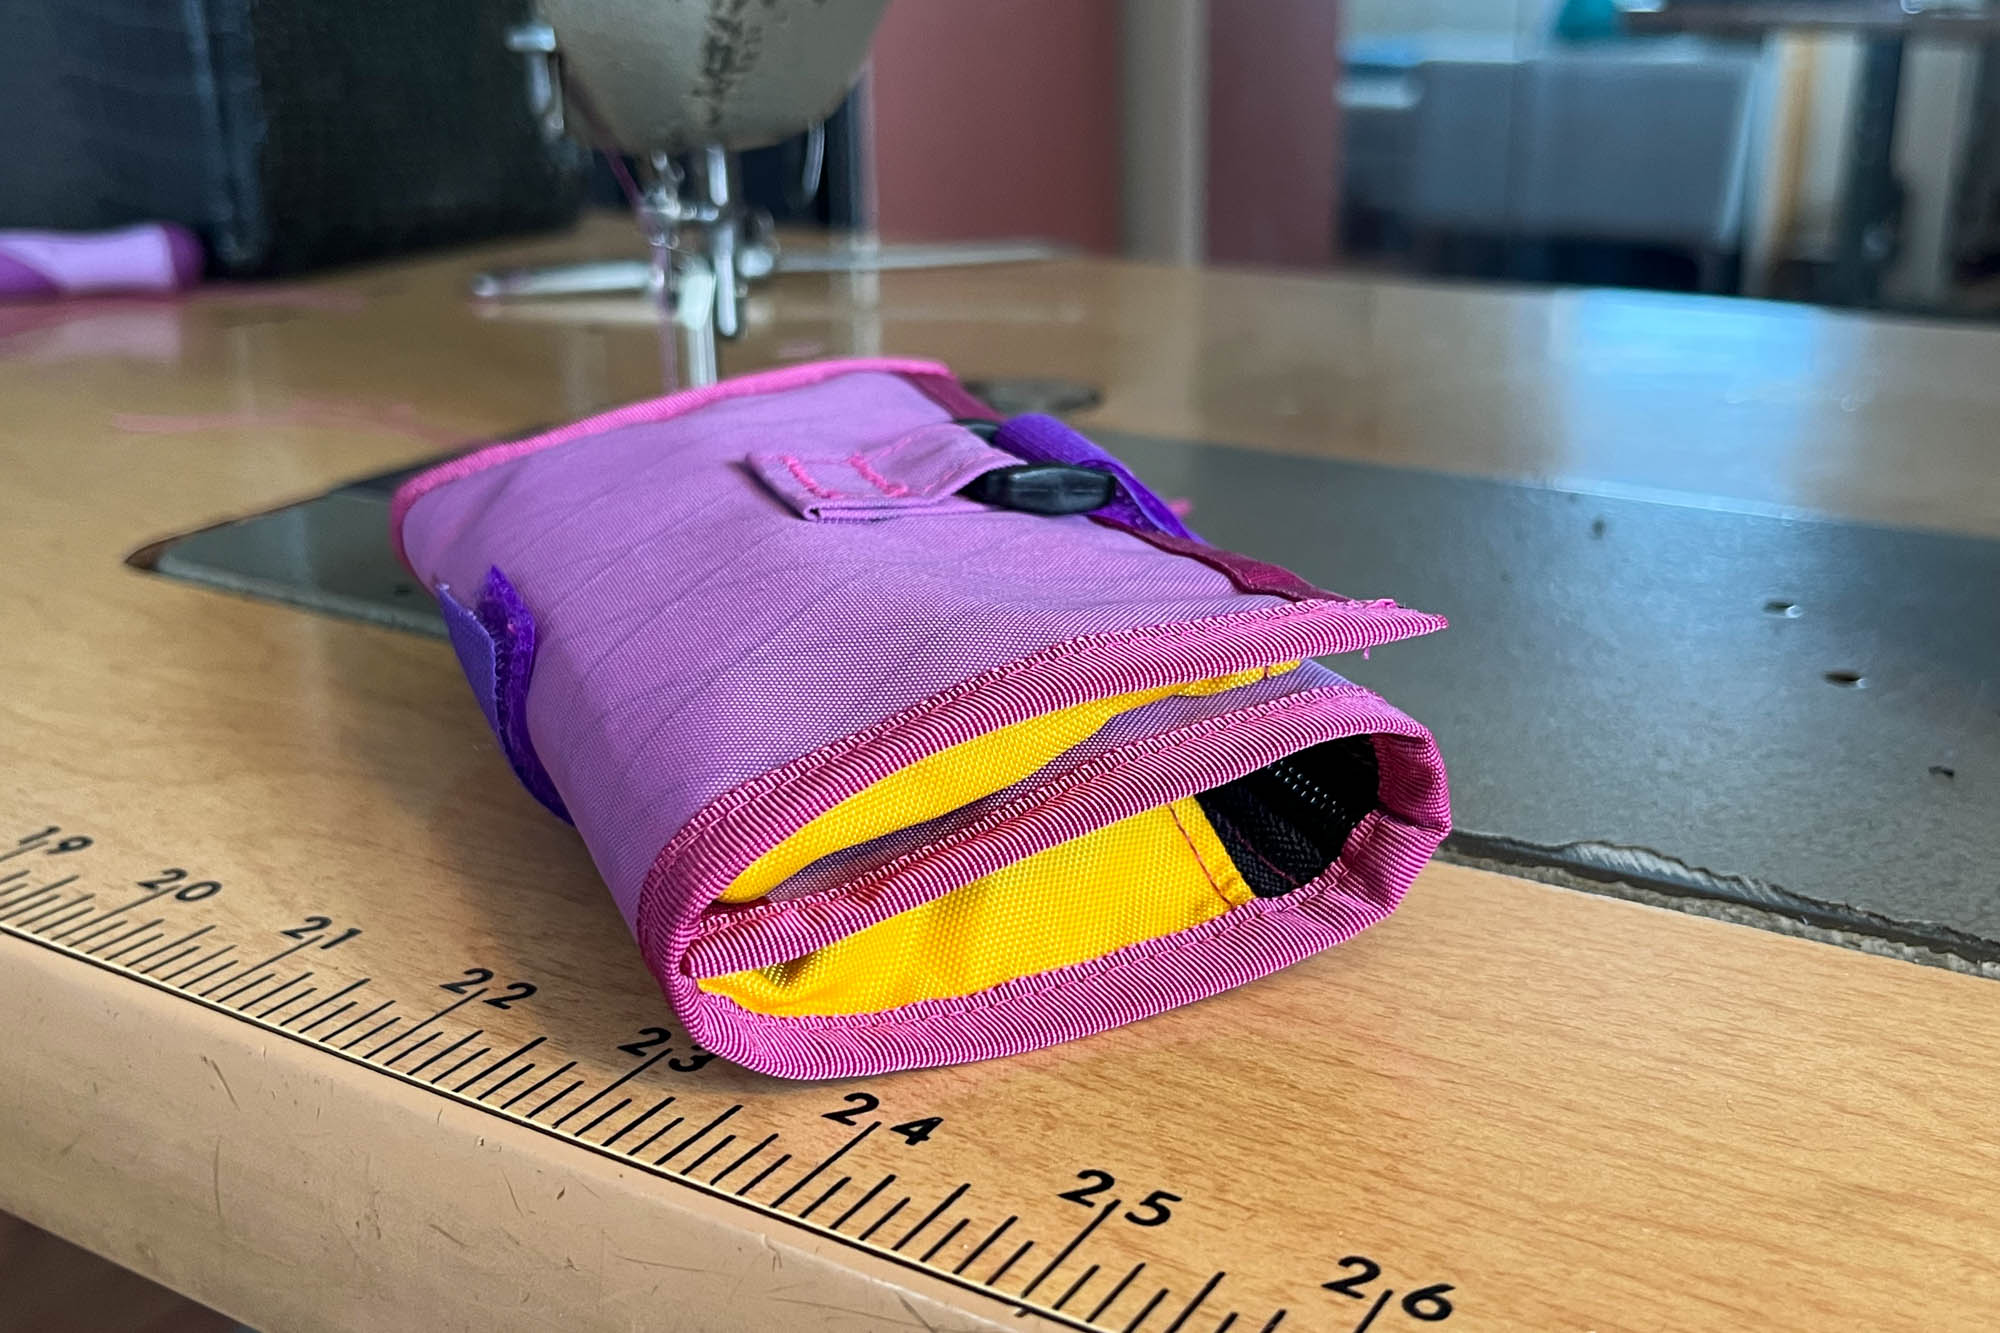
Bind the opposite short edge next. Finish the project by binding the remaining long edges, backstitching at all corners. Leave a tiny 1–2mm overhang of grosgrain at the corners when trimming; gently heat and press the ends together with your fingers for a bomber finish.
Want more inspiration for DIY bikepacking bag and gear projects? Be sure to browse our full archive featuring dozens of step-by-step guides by visiting the #MYOBG tag.
Further Reading
Make sure to dig into these related articles for more info...
Please keep the conversation civil, constructive, and inclusive, or your comment will be removed.
















 English (US) ·
  French (CA) ·
  French (FR) ·