

 2 hours ago
3
PROTECT YOURSELF with Orgo-Life® QUANTUM TECHNOLOGY
Orgo-Life the new way to the future Advertising by AdpathwayI’ve spent years measuring how much vibration suspension forks, seatposts, stems, handlebars, wheels, tyres and saddles absorb. Some products delivered impressive improvements, while others turned out to be little more than clever marketing.
My goal has always been to build a comfortable gravel bike that glides over rough roads, reduces fatigue on long rides and still feels fast and fun to ride.
My latest Trek Checkpoint+ build is the result of years of testing, measuring and refining. In this article, I’ll share the biggest lessons I’ve learned about improving gravel bike comfort, rank my upgrades by how much they’ve improved my riding experience, and take a closer look at the complete build.
Let’s get into it!
The Main Lessons
After more than 50 Comfort Lab reviews, three lessons have shaped how I’ve built my latest gravel bike.
- Suspension makes the biggest difference. Suspension forks and seatposts consistently deliver much greater vibration reductions than flex in handlebars, frames or wheels.
- Comfort goes beyond vibration damping. Ergonomics, riding position and saddle support all play a major role in how comfortable a bike feels after several hours in the saddle.
- Comfort shouldn’t come at the expense of fun. There’s a point where too much compliance can make a bike feel disconnected from the terrain. I still want something efficient and fun to ride – a bike that makes me want to take the long way home.
With these lessons in mind, I’ll rank my upgrades in order of how much they’ve improved my comfort, starting with the ones that have made the biggest difference.
The Biggest Improvement: A Gravel Suspension Fork
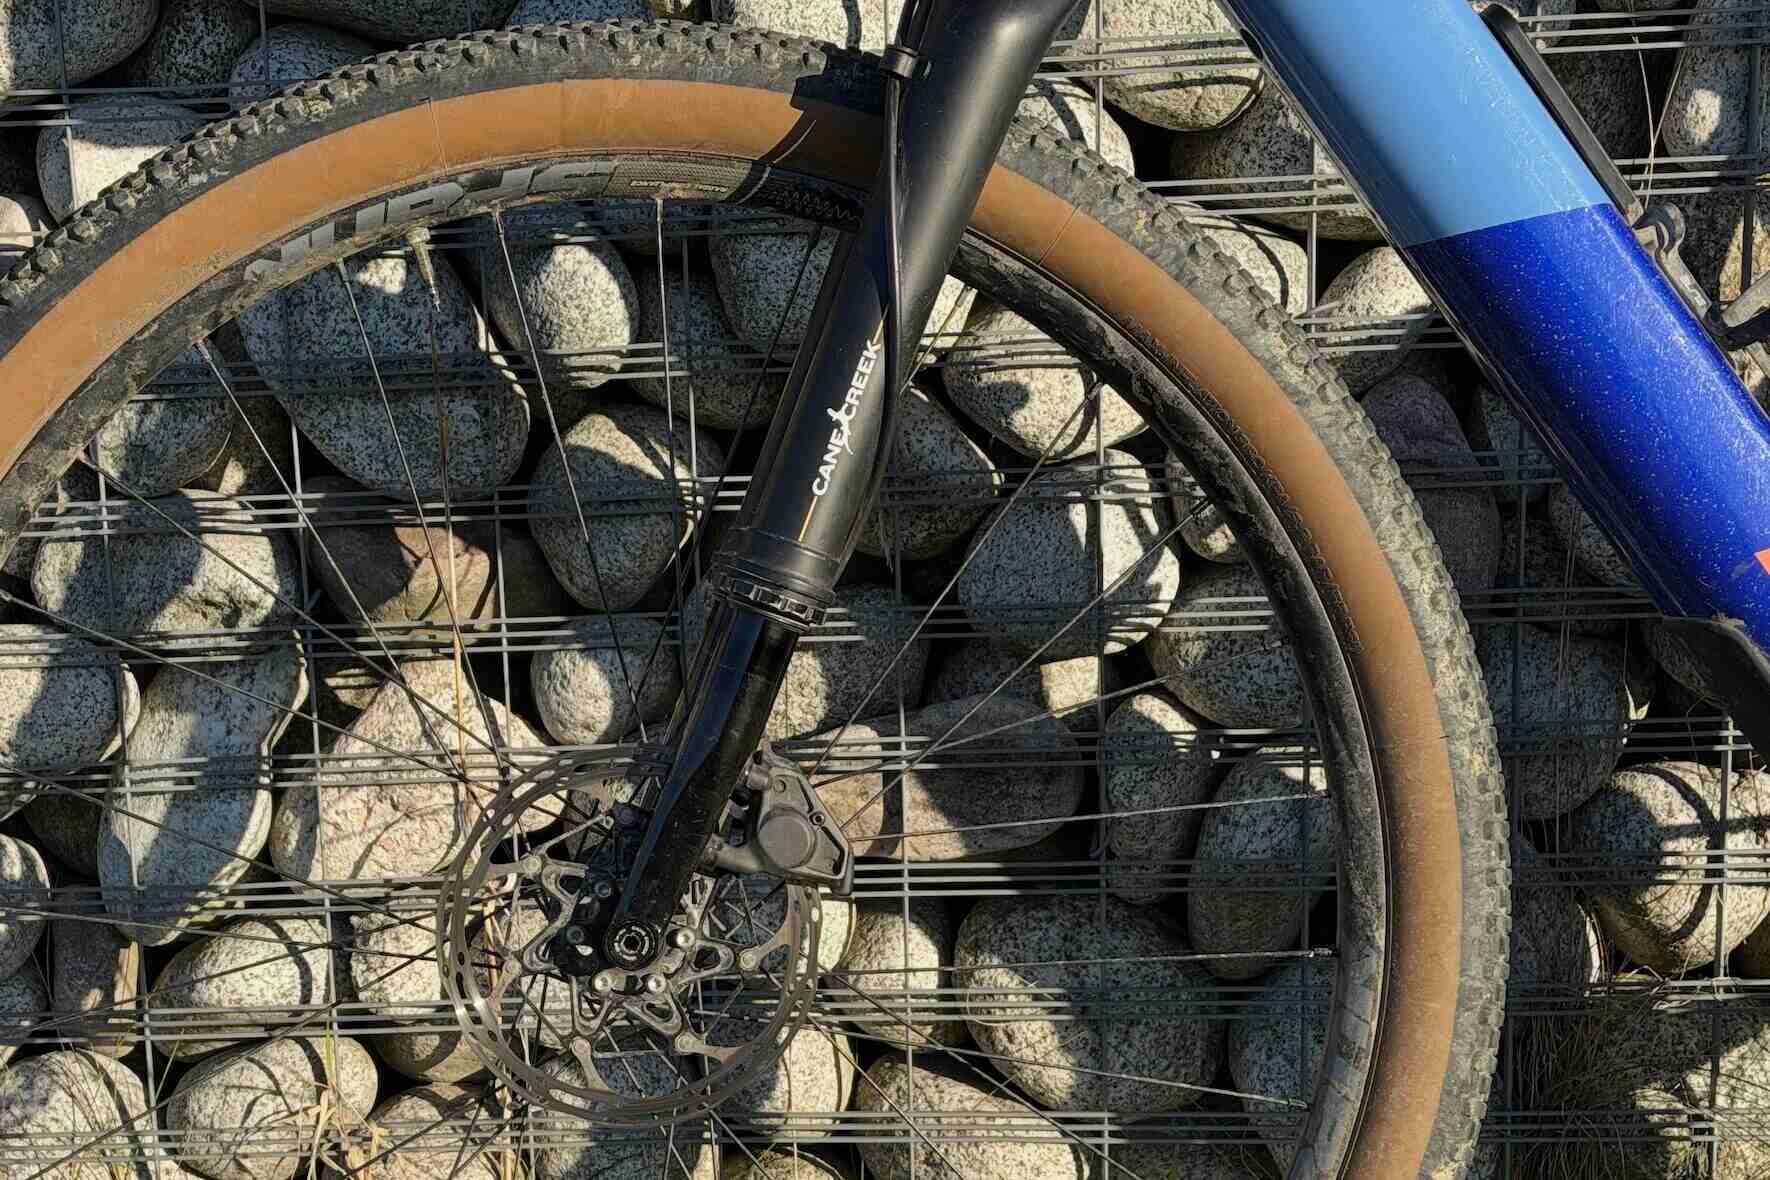
If there’s one component that has improved my gravel bike comfort more than anything else, it’s the Cane Creek Invert suspension fork. It’s exceptionally good at absorbing the small, repetitive bumps that make gravel riding so tiring.
The Invert is an unusual fork. It uses an upside-down design, offers just 40 mm of travel, and does away with the damper found in virtually every conventional suspension fork. The idea is that gravel riding involves more high-frequency chatter than big impacts, so prioritising sensitivity to small bumps can make more sense than controlling larger suspension movements.
And it works. The front wheel seems to float over small rocks, delivering something close to the magic carpet ride I’ve been chasing in a gravel fork.
My vibration testing backs this up. Over an obstacle designed to replicate the chatter of a bumpy gravel road, the Cane Creek Invert reduced vibrations by 16% more than the HiRide Sterra suspension fork. That’s impressive considering the HiRide already reduced vibrations by 6% compared with a rigid carbon fork.
| HiRide Sterra Suspension | 2.26 | – |
| Cane Creek Invert Fork | 1.90 | 15.9% Fewer Vibrations |
The Invert fork isn’t perfect, though. Without a damper, it feels less composed than conventional suspension forks on rough, technical descents. I noticed this particularly on rocky singletrack. It also has external brake routing, lacks fender and dynamo mounts, and costs over US$1,000.
But that’s not where I spend most of my time. This bike is built for fast gravel roads, forest tracks and long, mixed-surface rides. In those conditions, the Invert’s combination of comfort, low weight and simplicity is outstanding.
Cane Creek specifies a maximum tyre clearance of 50 mm, but I’m running a 55 mm tyre. I’m not recommending that everyone exceed the manufacturer’s clearance limits, particularly in muddy conditions where debris can become trapped. Rather, it highlights how conservative published tyre clearances can sometimes be.
I used to run suspension stems, but the Invert has made them largely redundant. When I tested both together, the combination added a little extra comfort, but it also introduced more movement between my hands and the front wheel. I’ve found I prefer to keep my steering a little bit more direct.
The Best Suspension Seatpost I’ve Tested
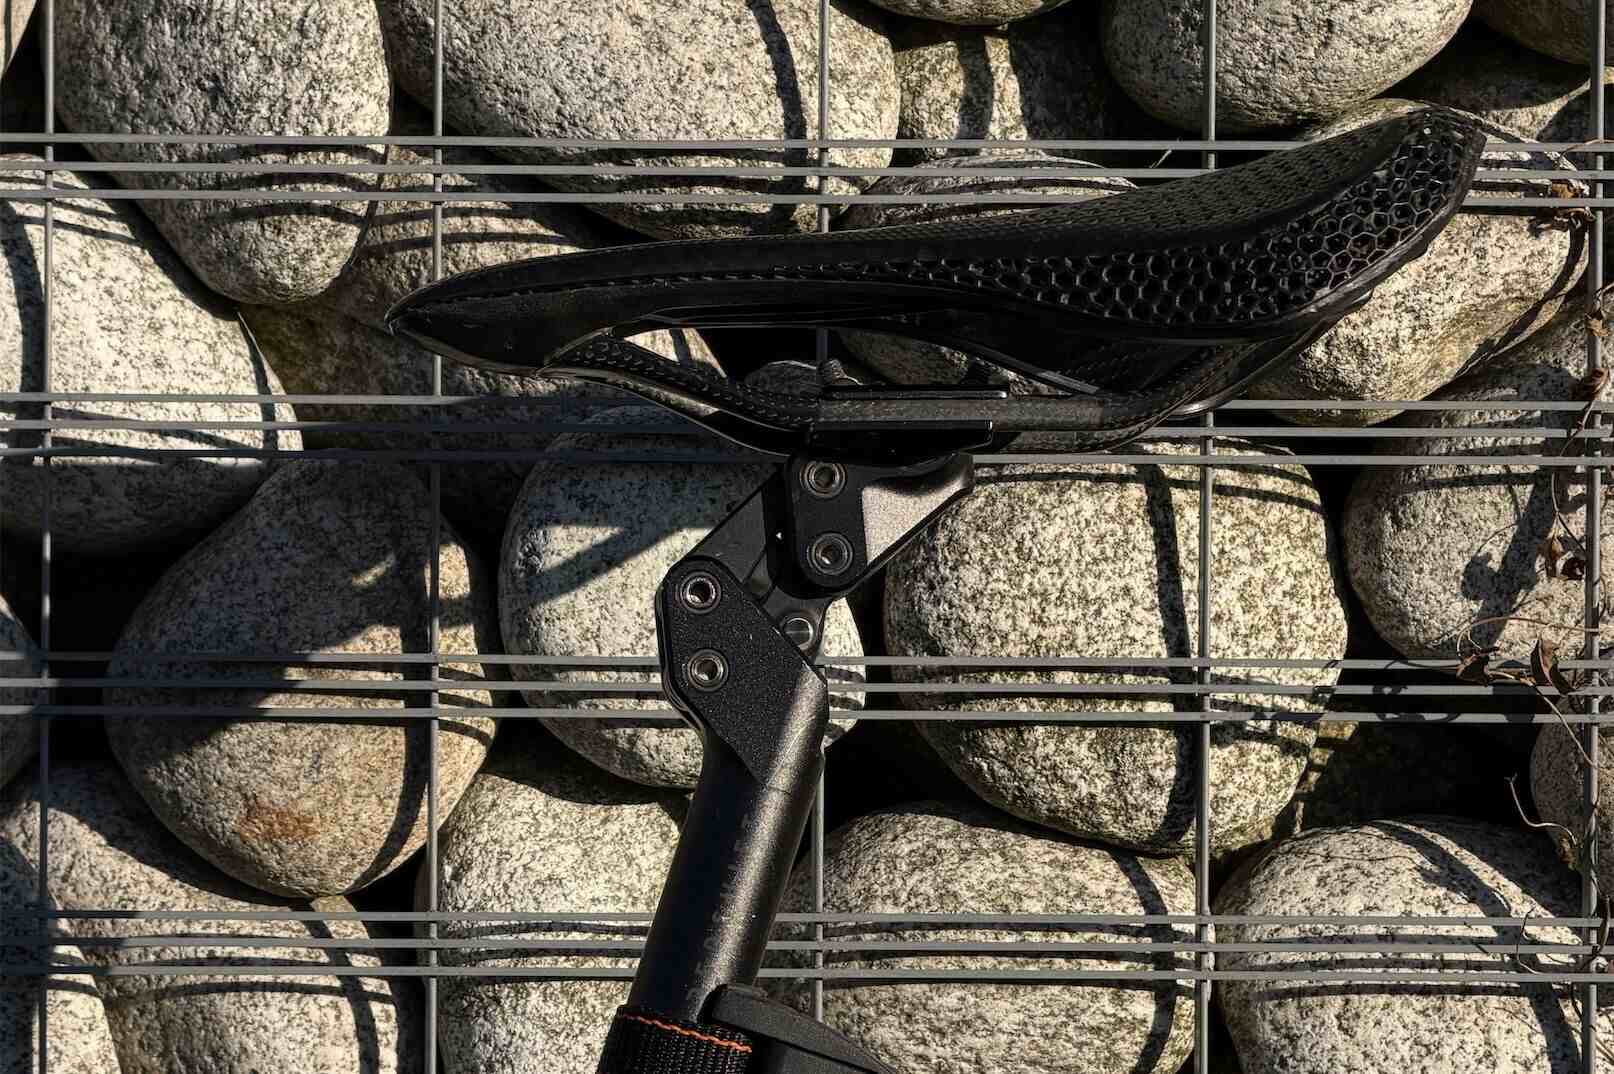
I’ve tested more suspension seatposts than I can remember. Some worked well but felt too springy or bouncy, while others moved smoothly but struggled to absorb bigger impacts. The Redshift ShockStop PRO Endurance strikes the best balance I’ve found.
It combines a coil spring with an elastomer to deliver 35 mm of travel. The coil responds quickly to bumps, while the elastomer helps control unwanted bouncing. The result is a seatpost that feels smooth and controlled, and my vibration measurements back up that impression.
The difference is most noticeable on rough roads, where the seatpost takes the sting out of repeated impacts and lets me stay seated comfortably for longer. The Mondraker equipped with the Redshift seatpost recorded 19.2% less rear-wheel vibration than when it was fitted to a rigid aluminium seatpost.
| Aluminium Rigid Post | 2.39 | – |
| Redshift PRO Endurance | 1.93 | 19.2% Fewer Vibrations |
The main trade-off is weight. The Redshift is around 200–250 grams heavier than a standard seatpost, and suspension movement can also cost you a little efficiency on smooth roads.
That said, the energy equation can reverse on rough terrain. Excessive suspension movement can result in a power penalty of around 5 watts on smooth surfaces, while laboratory testing has found that suspension can save 13–14 watts on rough roads by reducing the energy lost to vibrations and bouncing.
For the kind of long, mixed-surface rides this bike is built for, that’s a trade-off I’m happy to make.
My Current Favourite Gravel Tyres and Wheels
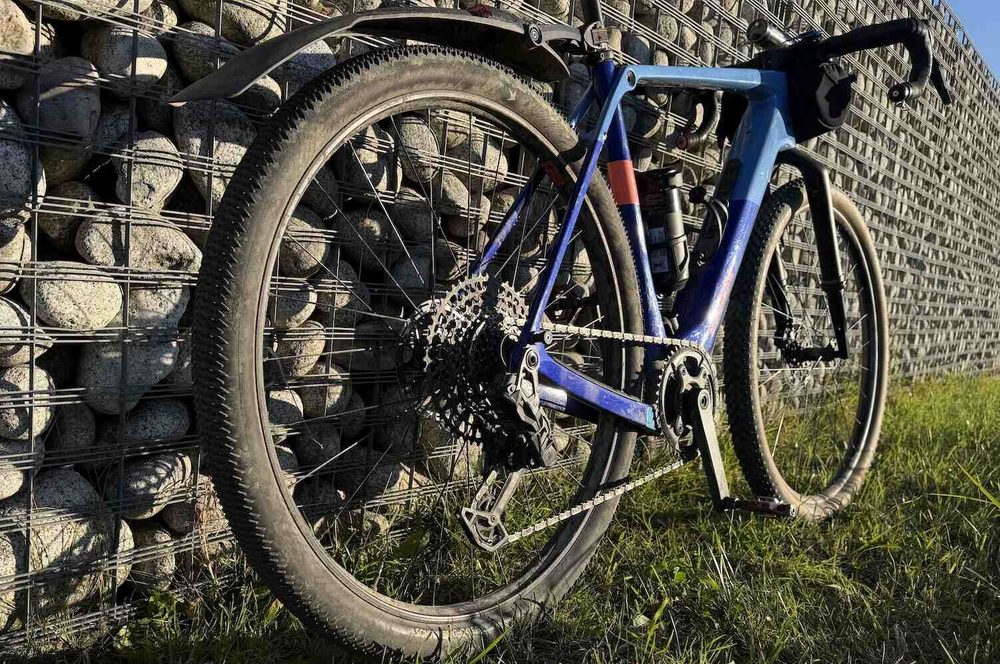
Tyres have an enormous influence on comfort, but wider isn’t automatically better. In my narrow vs. wide tyre test, I found that wider tyres only reduced vibrations when I lowered the pressure to account for the change in casing tension. In other words, make sure to reduce tyre pressure when you go up in width.
Interestingly, wider tyres may deliver even greater comfort benefits when paired with a suspension fork. ESMTB found that increasing tyre width from 45 mm to 50 mm reduced peak g-forces by 18.7% with a suspension fork, compared with just 1.9% with a rigid fork.
Why the difference? The tyre and suspension fork appear to work together as a two-stage system, with the tyre absorbing smaller, faster impacts before the fork deals with the remaining movement. Together, they can reduce the vibrations reaching the rider more effectively than either system alone.
That made me keen to run the widest tyres I could reasonably fit on my gravel bike and take full advantage of this combination.
Front Wheel Setup
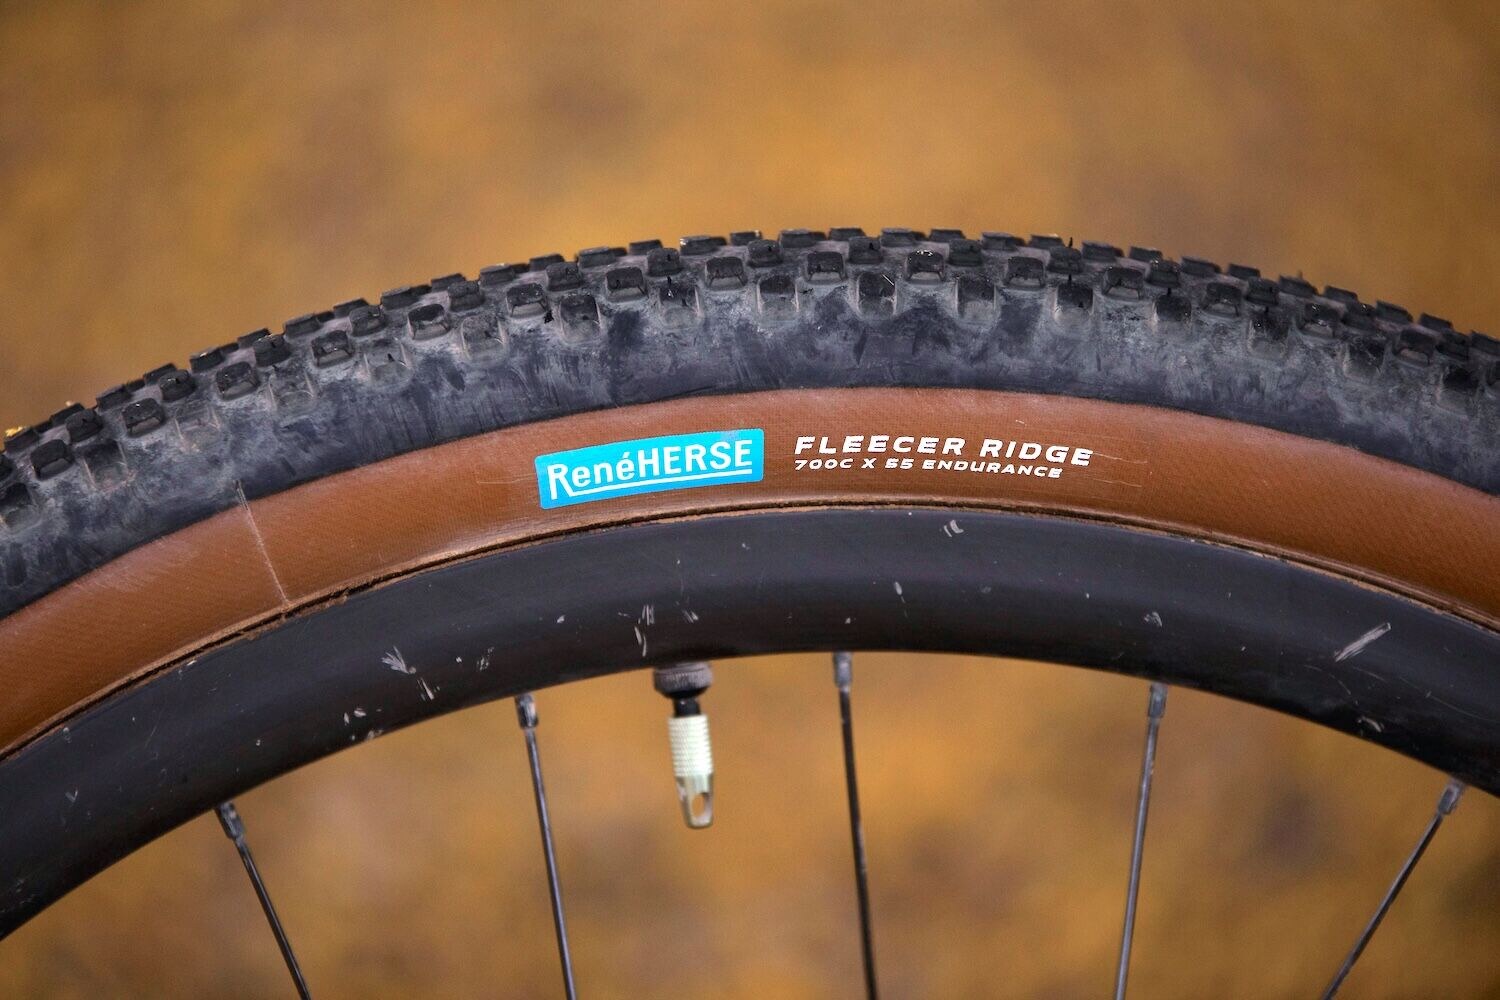
Up front, I’m running the 55 mm Rene Herse Fleecer Ridge in the Endurance casing. Its large, widely spaced knobs provide the grip I need on the loose surfaces I ride.
Running it at just 19 psi (1.3 bar) helps deliver the smooth, magic-carpet ride I’m after.
It’s not the fastest-rolling tyre. In fact, it performs quite poorly in this regard, according to Bicycle Rolling Resistance. However, I’m less concerned about front tyre rolling resistance, as more of my body weight sits over the rear wheel.
For the rim, I’m using a Spank Flare 24 Vibrocore. Spank promotes its Vibrocore technology for vibration damping, but with the Invert suspension fork already doing most of the work up front, that wasn’t my primary reason for choosing it. I wanted a strong, dependable front wheel, and so far, it’s delivered.
Interestingly, the combination does feel particularly smooth. It’s possible that the rim and suspension fork complement each other by responding differently to certain vibration frequencies, but I haven’t measured this combination closely enough to confirm that.
Rear Wheel Setup
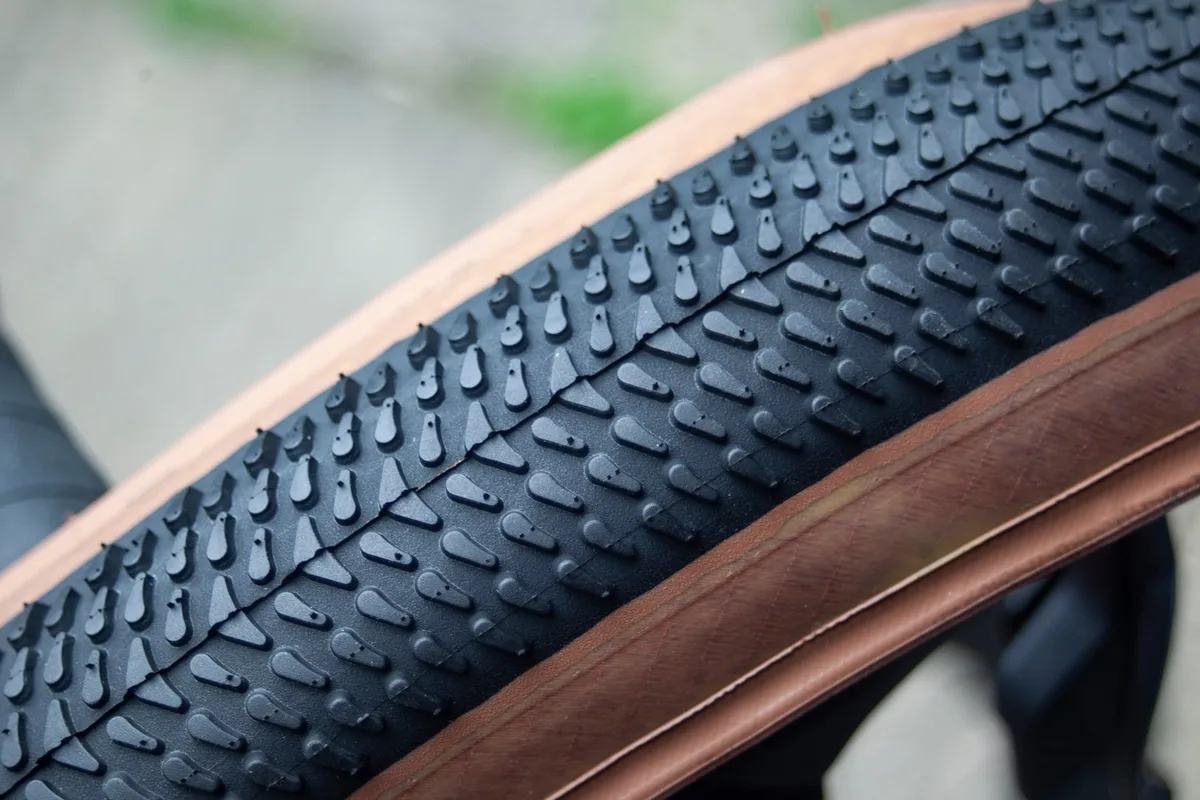
At the rear, I’m running the Schwalbe G-One R Pro in a 55 mm size (56 mm measured). It’s one of the faster gravel tyres around: the 50 mm version recorded just 16.7 watts of rolling resistance at 28 PSI in a Bicycle Rolling Resistance lab test. So far, traction and durability have also been good.
The rear tyre and suspension seatpost perform slightly different roles. The tyre smooths out small, high-frequency surface irregularities, while the seatpost helps absorb larger impacts before they reach my body. Running the tyre at 22 psi (1.5 bar) gives me the compliance I’m looking for on rough gravel and forest tracks, without making the bike feel vague or unstable in corners.
For the rear rim, I’ve chosen the Zipp 101 XPLR. Its carbon construction is designed to allow the rim edges to flex slightly under load, effectively pivoting around either side of the spoke bed. As the wheel rolls over obstacles, this flex is intended to provide a little extra vertical compliance.
I haven’t been able to measure a meaningful comfort improvement over a conventional rim, as my testing methodology isn’t sensitive enough to isolate the relatively small differences in wheel vibration. But what I can say is that the rim’s 27 mm internal width works well with my 55 mm tyre, giving it a shape I’m happy with.
The Most Comfortable Gravel Bike Handlebars
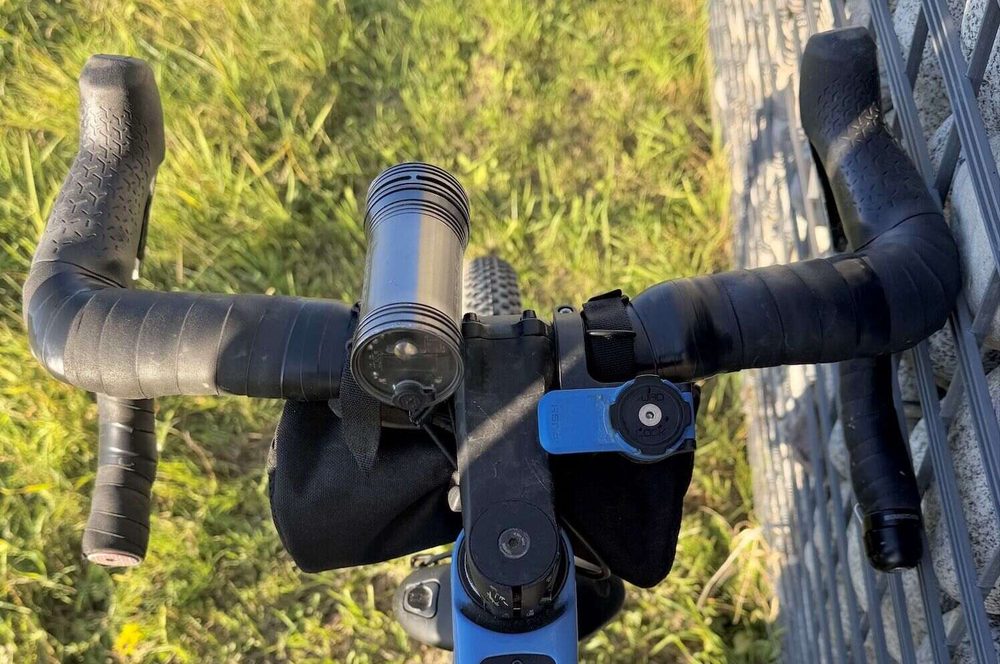
I’ve spent a lot of time investigating which handlebars offer the greatest vibration damping on a gravel bike. But with my Invert suspension fork doing most of the work up front, the handlebar itself is unlikely to make a huge difference to overall comfort.
In my Deda Gera vs. Lauf Smoothie handlebar comparison, the bar that performed best in my vibration testing wasn’t actually the most comfortable to ride. What mattered more over a long day was how naturally my wrists, hands and shoulders aligned with the handlebars.
While I was very happy with the Deda Gera, I wanted to try something wider and flatter, so I’ve switched to the SQlab 312 R. Its flattened tops angle forwards slightly, spreading pressure across the palms and giving my hands a more supportive resting position.
The main compromise is that it doesn’t have the wide drops of a dedicated gravel handlebar. With just 1.5° of flare, it’s primarily designed for road riding. But I’ve found that I prefer a compact, sporty cockpit, so this hasn’t been a problem.
For me, this is another reminder that handlebar comfort isn’t just about absorbing vibrations. Finding a shape that supports your hands naturally can make a much bigger difference over a long day in the saddle.
Bar Tape Makes A Big Difference
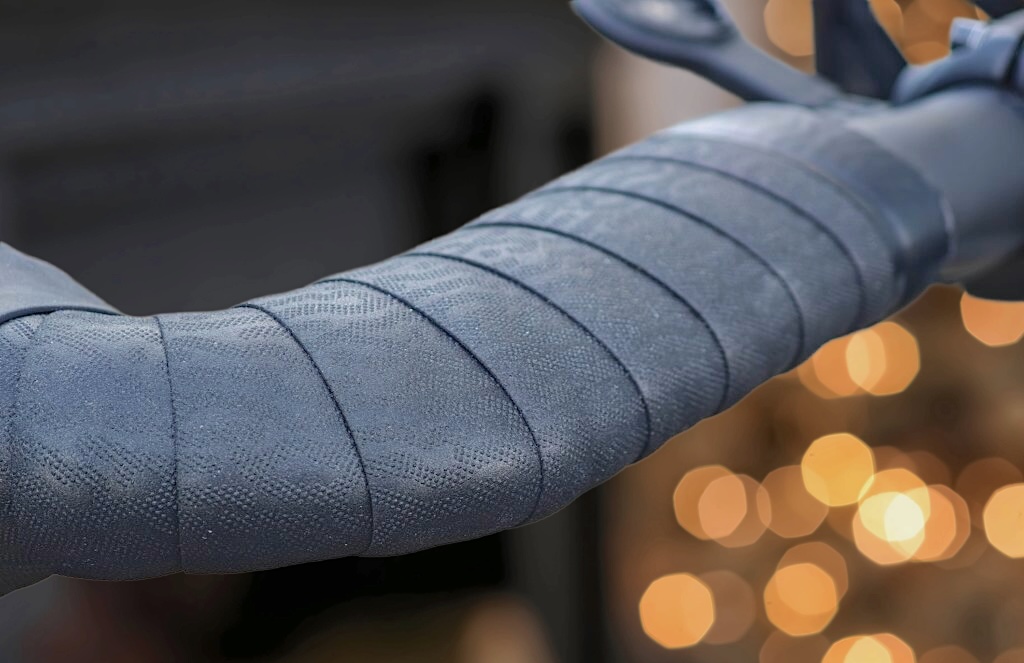
Bar tape is often overlooked, but your hands are one of the main contact points with the bike. I think it deserves more attention when it comes to comfort. Even if a suspension fork filters out much of the vibration coming through the front wheel, it can’t eliminate the pressure your hands experience while supporting your upper body.
A few years ago, I went on a quest to find the most comfortable bar tape. One thing became clear: thicker tapes, particularly those measuring 3 mm or more, consistently ranked among the most comfortable options.
Ergon’s BT OrthoCell scored 9/10 for comfort in my back-to-back testing, narrowly missing out on the top spot to Silca Nastro Cuscino. It’s made from a special 3 mm-thick orthopaedic foam that Ergon claims maintains its rebound and damping properties over time, rather than gradually packing down like conventional bar tape.
What I like about the OrthoCell tape is that it tackles two sources of discomfort: it absorbs vibrations transmitted through the handlebars, and helps distribute pressure more evenly across the palms.
In practice, it works exceptionally well for me. I can ride for eight hours without experiencing numb hands, and both the grip and feel of the tape are excellent.
Durability isn’t its strongest point, as you can see in the photo of my handlebars above. But given the comfort it provides, I’m happy to accept that trade-off.
The Most Comfortable Saddle I’ve Found
Saddle comfort is complicated. From a vibration-damping perspective, my saddle vibration tests found that the Brooks C17 could damp up to 11.5% more vibration than the firmer Specialized Power Comp.
But as many of you will know, the softest saddle isn’t necessarily the most comfortable. A saddle’s primary job is to support your sit bones, distribute pressure evenly and keep your pelvis stable while pedalling.
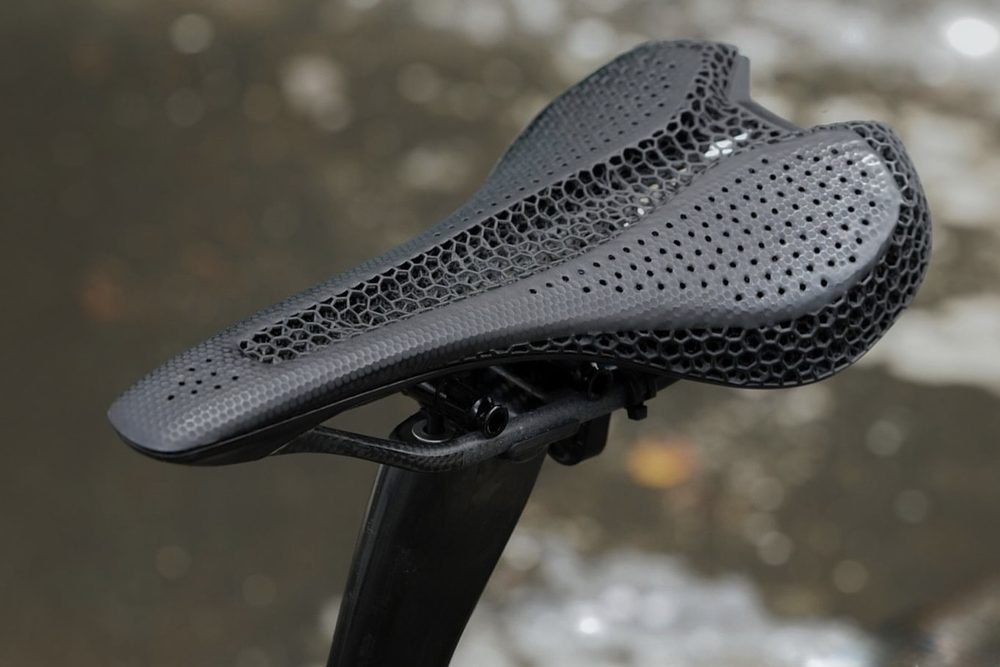
For me, the Specialized Romin EVO Mirror is the most comfortable saddle I’ve found. It uses a 3D-printed honeycomb structure rather than conventional foam, providing firm support while distributing pressure across the saddle to help reduce concentrated loading on sensitive soft tissue.
With the Redshift suspension seatpost underneath, the saddle doesn’t need to absorb every impact. The seatpost takes care of much of the larger movement, leaving the saddle to do what it does best: support my body comfortably and keep my pelvis stable while pedalling.
Of course, saddle comfort is highly personal. Pelvis shape, riding position and individual pressure distribution all influence what works best. I wouldn’t claim this is the most comfortable saddle for everyone, but for me, it’s the clear winner.
My Most Comfortable Gravel Bike Yet
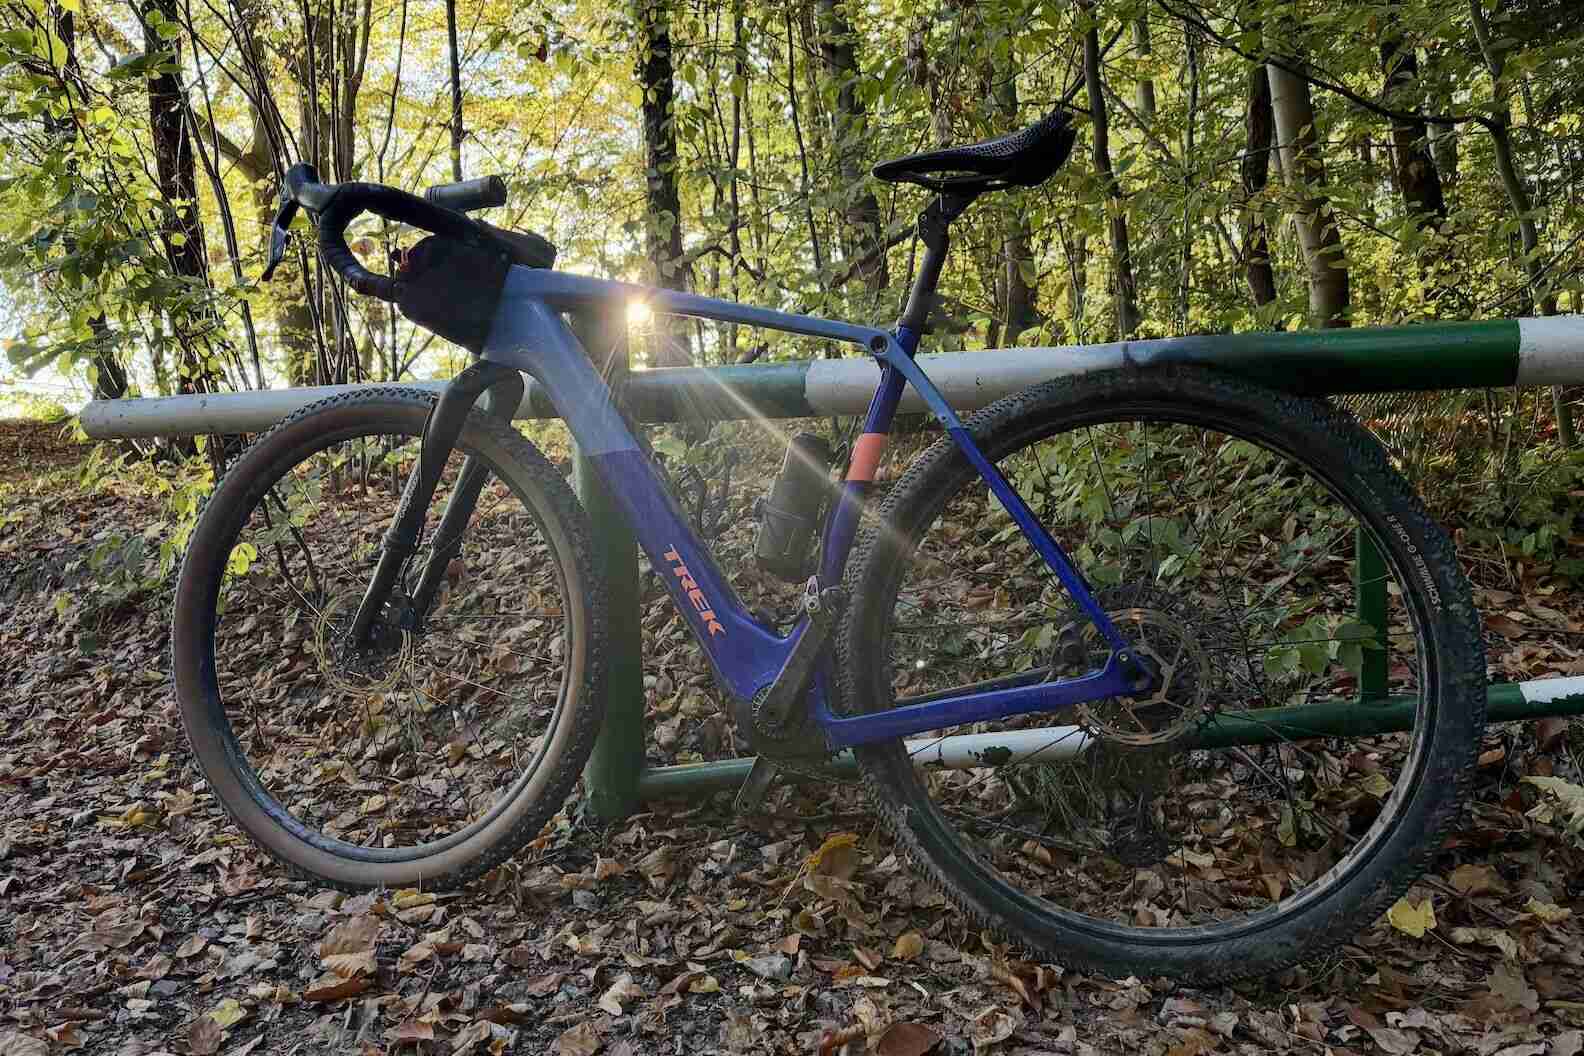
I’ve built my latest comfort-focused gravel bike around the Trek Checkpoint+ SL, bringing together the components that have performed best in my Comfort Lab testing.
One thing my previous bikes have taught me is that frame material alone doesn’t determine comfort. Once you have effective suspension at the contact points — particularly a suspension fork, wide tyres and a suspension seatpost — the frame’s contribution to overall comfort becomes less significant.
For me, that means I can prioritise other qualities in a frame. I want it to feel responsive and efficient, with stiffness where it matters, rather than relying on frame flex to absorb every bump.
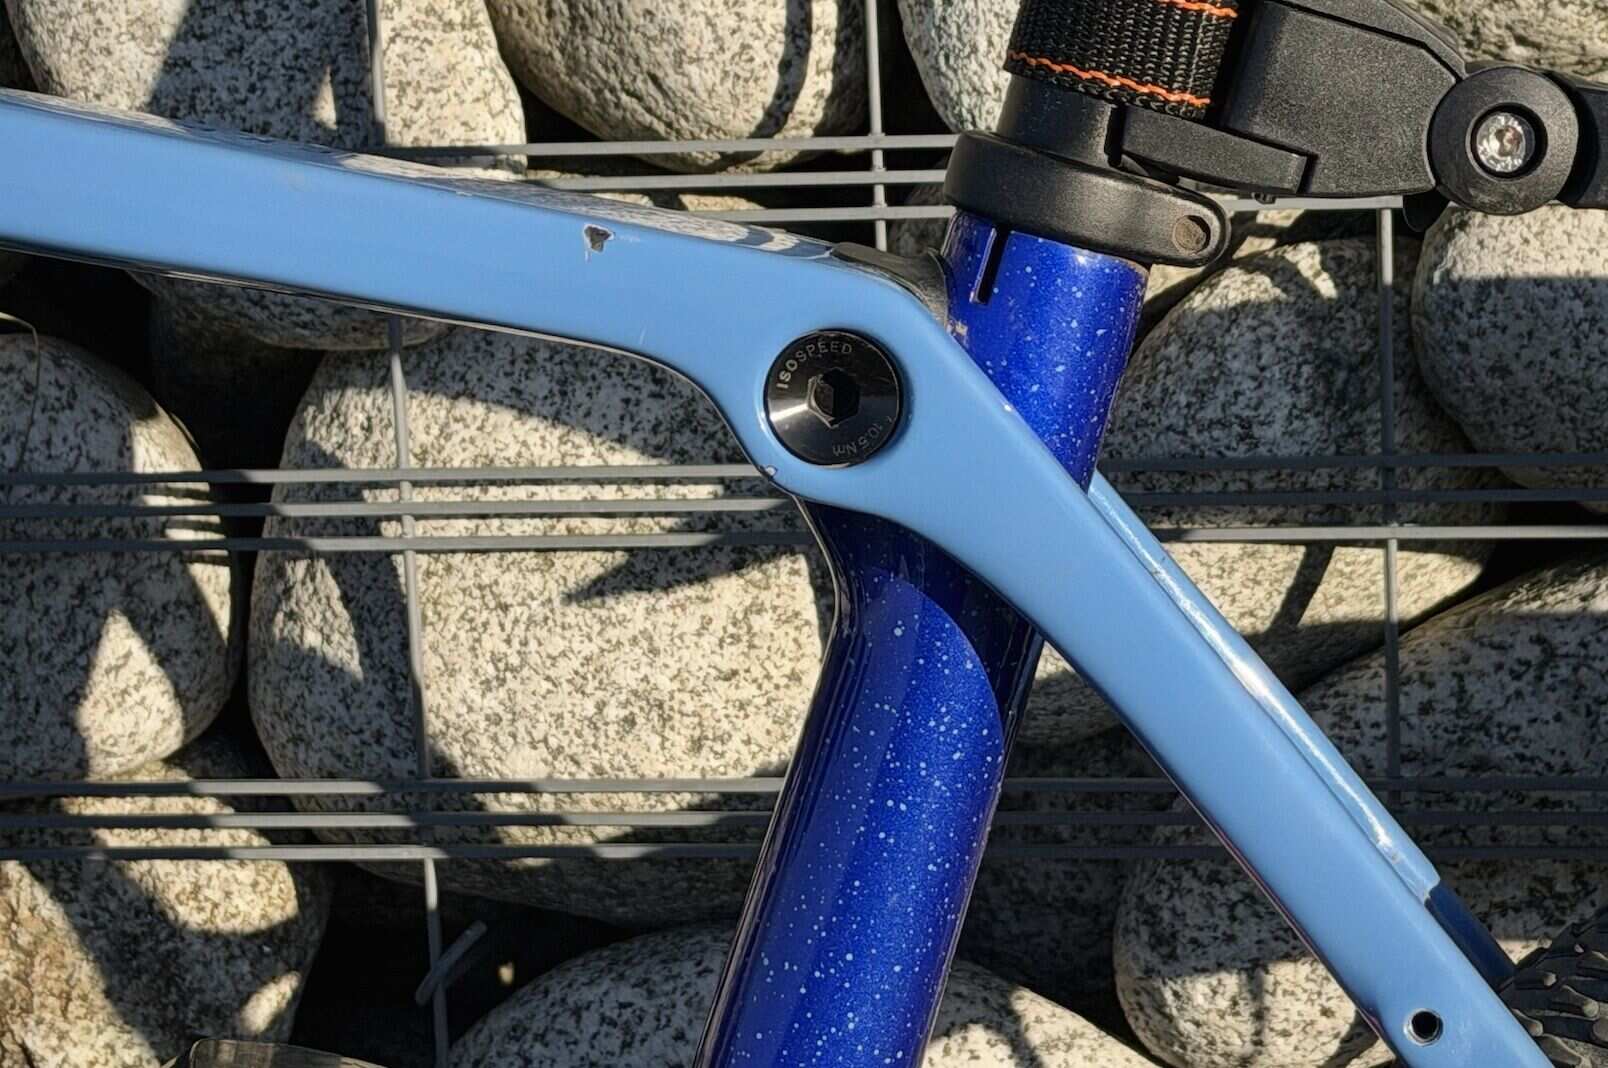
The Checkpoint’s IsoSpeed system is a good example of this approach. It allows the seat tube to flex independently of the top tube, providing some additional compliance without requiring a rear shock. This complements the Redshift suspension seatpost nicely: the frame adds a little give, while the seatpost provides controlled movement to absorb larger impacts.
Another major reason I chose the Checkpoint is that Trek approves the use of suspension forks on this platform. Many gravel frames aren’t designed around the taller axle-to-crown height of a suspension fork, which can alter the bike’s geometry. The Checkpoint gives me the flexibility to build around the Cane Creek Invert without stepping outside the manufacturer’s intended setup.
Add in a comfortable frame geometry and mounting points for racks, mudguards and bikepacking bags, and it makes an excellent foundation for the long, mixed-surface adventures I have planned.
One important caveat: Trek lists 50 mm as the maximum tyre width for the Checkpoint+ frame, while my rear tyre measures 56 mm on the rim. That exceeds the manufacturer’s stated limit, so I can’t recommend this setup as universally safe. Actual clearance depends on the frame, rim, tyre and wheel alignment, and mud or debris can make an already tight gap particularly risky. It’s something I monitor carefully on my own bike.
Bike Vibration Test Results
| BMC URS AMP | 1.65 g – Baseline | 1.52 g – Baseline |
| Mondraker Dusty R | 1.54 g – 6.7% Reduction | 1.12 g – 26.3% Reduction |
| Trek Checkpoint+ | 1.38 g – 16.4% Reduction | 0.94 g – 38.1% Reduction |
In my testing, the Trek Checkpoint+ recorded the lowest average vibration levels at both the front and rear. Using the BMC URS AMP as the baseline, which is already a super comfortable bike with suspension elements, the Trek recorded 16.4% less front-end vibration and a whopping 38.1% less rear-end vibration!
The difference in front-end comfort between the BMC and Mondraker is harder to explain, as both use the same HiRide Sterra gravel suspension fork and similarly sized 45 mm tyres. It’s possible the forks have slightly different tuning, although I haven’t verified this.
The Trek’s advantage is easier to understand. Its Cane Creek Invert fork uses a damper-free design that prioritises sensitivity to the small, repetitive bumps common on gravel roads. This appears to be a particularly effective combination for reducing the vibrations measured at the handlebars. Of course, having 55 mm tyres running at 19 psi also helps.
At the rear, the BMC uses a conventional rigid carbon seatpost, while both the Mondraker and Trek use the Redshift suspension seatpost. That alone helps explain why the latter two recorded much lower rear vibration levels.
The Trek goes a step further with its IsoSpeed decoupler, which allows the seat tube to move more independently of the top tube, adding another degree of frame compliance. Its 55 mm rear tyre also helps filter out vibrations before they reach the rider.
Taken together, these results demonstrate how combining suspension at different points on the bike can deliver a substantial improvement in comfort. The Trek’s advantage isn’t down to any single component, but rather how its fork, seatpost, tyres, and frame work together.
The Best Motor I’ve Tested
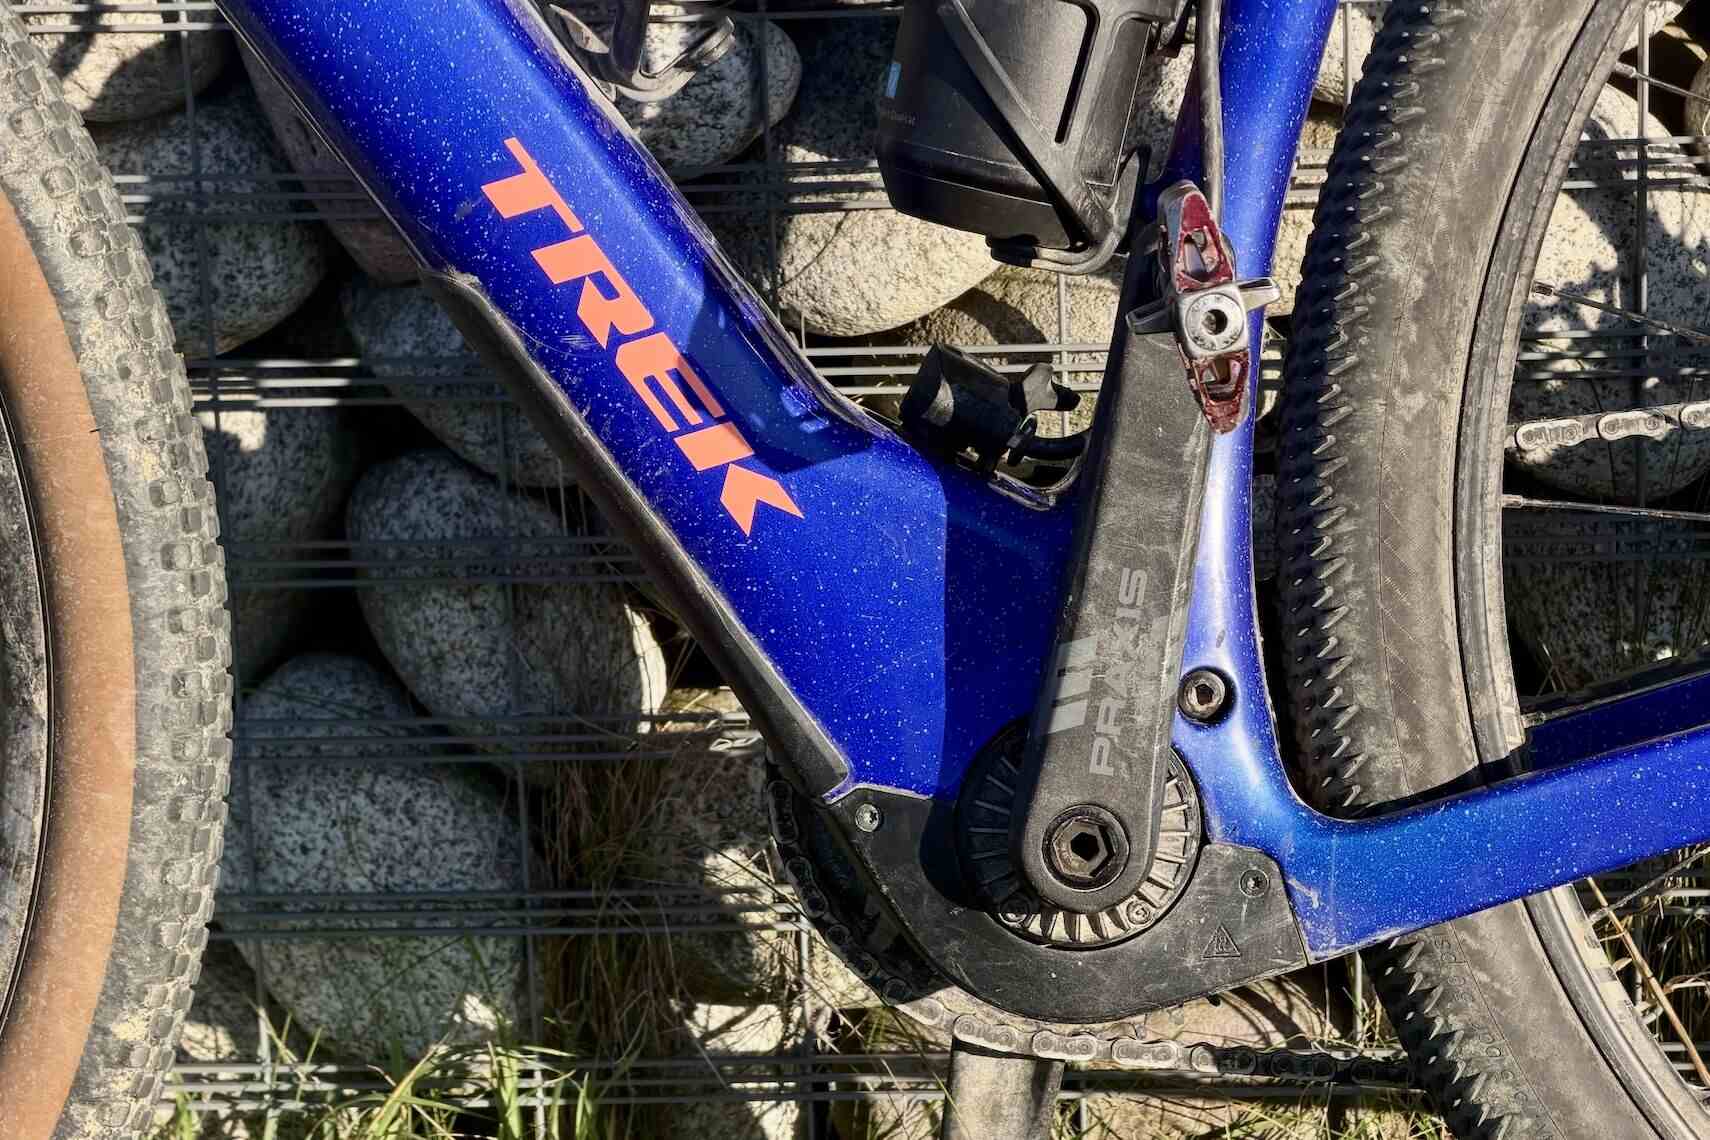
You might wonder why my ultimate comfort gravel bike has a motor. For me, a little assistance makes it easier to ride further, explore steeper terrain and stay seated with a steady cadence and relaxed upper body. That means less strain over long days in the saddle.
But I don’t want the motor to dominate the ride. This is where TQ’s systems stand out.
The TQ HPR60 is the smoothest, most natural-feeling motor I’ve tested. I first rode it on the BMC and later on my Trek, and the sensation is remarkably consistent: it feels as though your legs have simply become stronger, rather than as if a motor is pushing you along.
It’s not the most powerful light-assist motor available, but outright power isn’t my priority. Low resistance above the 25 km/h assistance limit matters more to me, because I regularly ride faster than that on gravel roads. I want a bike that still feels natural when I’m riding under my own power.
The HPR60 isn’t perfect, though. My biggest complaint is range. While it’s more efficient than the previous HPR50, I’ve struggled to get much beyond 60 km from my setup, which combines a 360 Wh battery with a 160 Wh range extender.
That’s a fairly limited range for the kind of long-distance gravel adventures I enjoy. If you’re considering an e-gravel bike with the HPR60, I’d strongly recommend looking at models with a larger battery. Some newer bikes, such as the Mondraker Dusty R, offer a 580 Wh battery as standard, which should provide considerably more flexibility for long rides.
For me, the HPR60 gets the ride feel right. I’d just like to pair it with more battery capacity.
Is This the Most Comfortable Gravel Bike I Can Build?
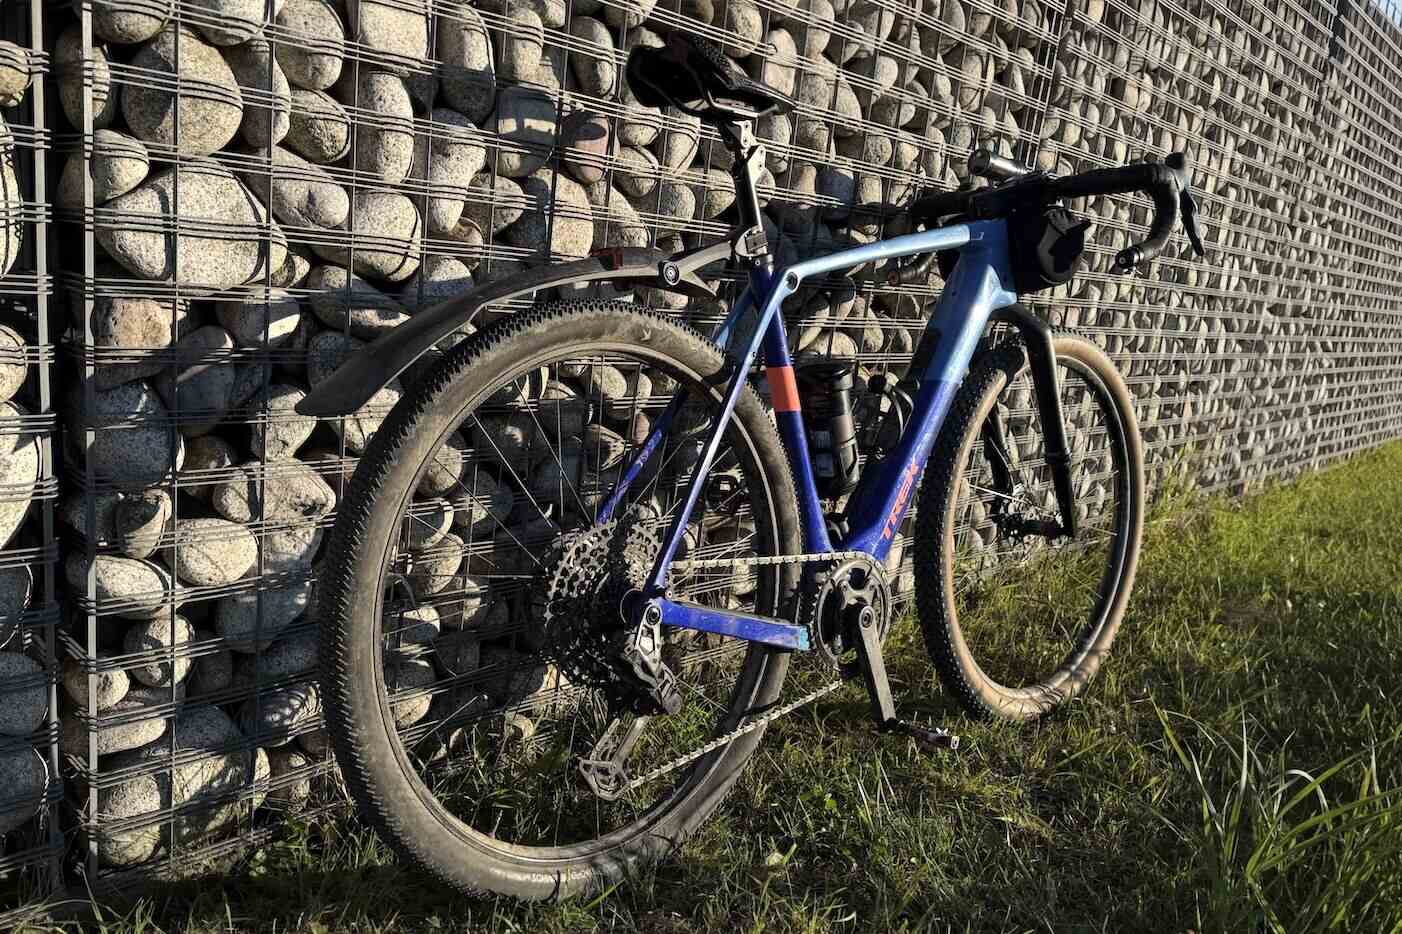
I don’t know yet. What I do know is that my Trek Checkpoint+ brings together the most effective comfort components I’ve tested, delivering the lowest vibration levels I’ve ever measured across my bikes so far.
I’m sure I could push those numbers even lower if I wanted to. But at this point, I think the overall ride experience matters more than chasing ever-smaller numbers on my accelerometer.
After years of testing, I’ve learned that my ultimate comfort bike doesn’t necessarily feel like a sofa on wheels. Too much movement can compromise the precise handling and direct feedback that make a gravel bike enjoyable to ride. I want a bike that excites me, makes me want to ride faster and further, and encourages me to explore those rough trails that disappear into the forest.
Once you’ve got highly effective suspension systems working together, each additional component tends to deliver diminishing returns.
From now on, I’m focused on building a balanced system rather than maximising the damping of every component. I want enough suspension to take the sting out of rough terrain, without losing the responsive feel that makes me love riding a bike in the first place.














 English (US) ·
 French (CA) ·
 French (FR) ·